Automations

Automations are a powerful part of the CRM module that allow for things to happen without your interaction based on predefined sequences. If you would like to set up logic that says, “if X happens then do Y,” then automations are your solution.


Key Automation Components

Automations are composed of three main pieces: Triggers, Actions and Filters.

Triggers – When these events occur, they can initiate an automation sequence. Below are some examples of triggers:

  • New Form Submission
  • New Phone Call
  • New Text Message
  • Field Status Update
  • New Contact Created
  • New Deal in the Pipeline
  • Deal Moved to Pipeline Stage

Actions – Actions can be strung together into a list of automated processes that can be performed. You can add as many actions as you would like in an automation. Below is an example of a list of actions that can be used to perform automated tasks within the system.

  • Condition
  • Send Email
  • Send SMS Text
  • Create Contact
  • Wait (the sequence will wait for a specified amount of time before continuing)
  • Update Field Status
  • End If (will end if something becomes true)
  • End If Review Submitted will end if a review is submitted)
  • Send Questionnaire


Filters – These are used with triggers, allowing you to limit a trigger being fired. For example, let’s say you have a trigger that you would like to be fired when a new form submission is submitted, but only if it is for a certain company or from a certain value in the zip code field.Filters make this possible. Depending on the trigger, you will have different options for the filters. You can combine as many filters as you like. When using more than one filter, it is necessary for all the filters to be true for the automation to continue.

There are different field types within LeadSnap. . The default zip code field is a “text field,” meaning that you have the ability to type in the filter value. If the field type is a text field, you can use a comma separated list to include multiple values. In these cases, the automation will continue if only one of these values matches an item on your list. If the field type is a dropdown menu, then you will have a selection box for the field value.

Variables

Variables allow you to reference dynamic information during your automation. Let’s make an example to be sure this is clear. Perhaps you have a client named Bob and he owns a company called Bob’s roofing. When you create the client user for Bob and assign to the company Bob’s roofing, this information can be available when an automation runs through the use of variables.

Add Variable to Message

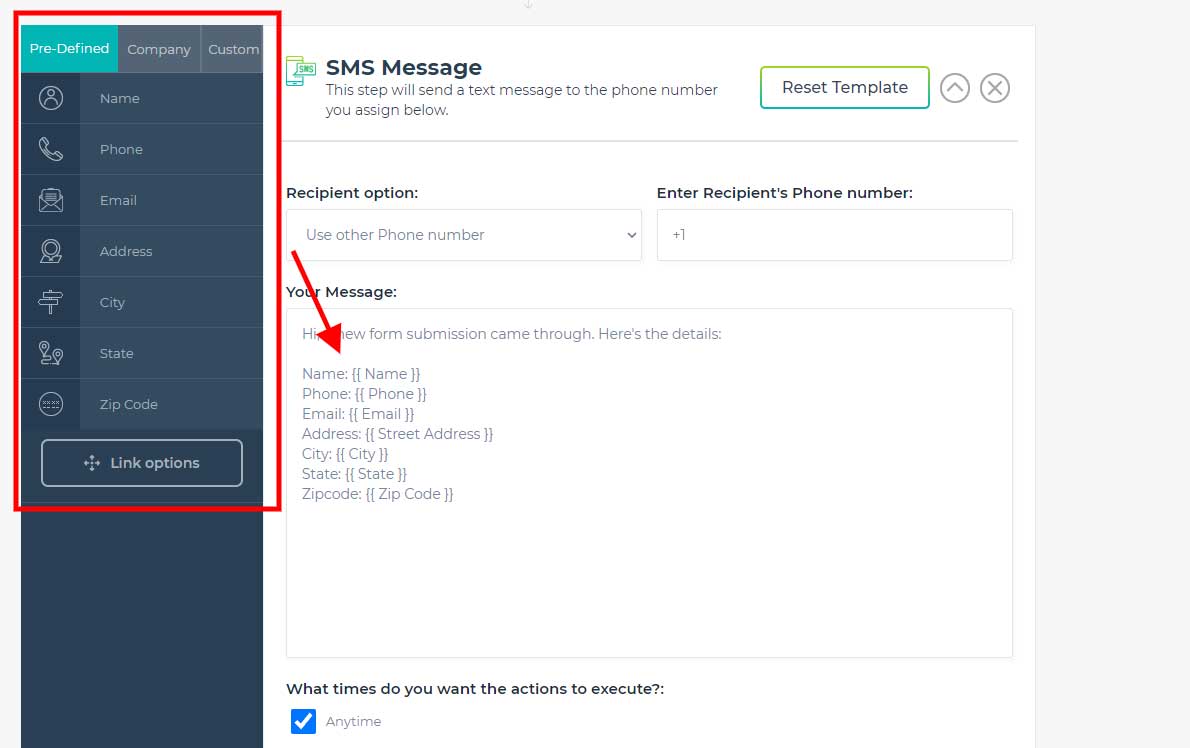
To add a variable to a message, you can drag and drop the variable into the message box. Wherever your cursor is in the message box field at the time you drop the variable inside, that’s where the variable will be located.

Variable Types

These variables are available when sending a text message or an email. Notice in the image below the three columns for Pre-defined, Company and Custom.

Pre-Defined – These variables come with LeadSnap right out of the box and are composed of common form or lead intake information we feel will be present for most lead opportunities.

Company – This information comes from the company information that you create. When you create the association of a client with a company we can use some of this information.
Button/Link Options

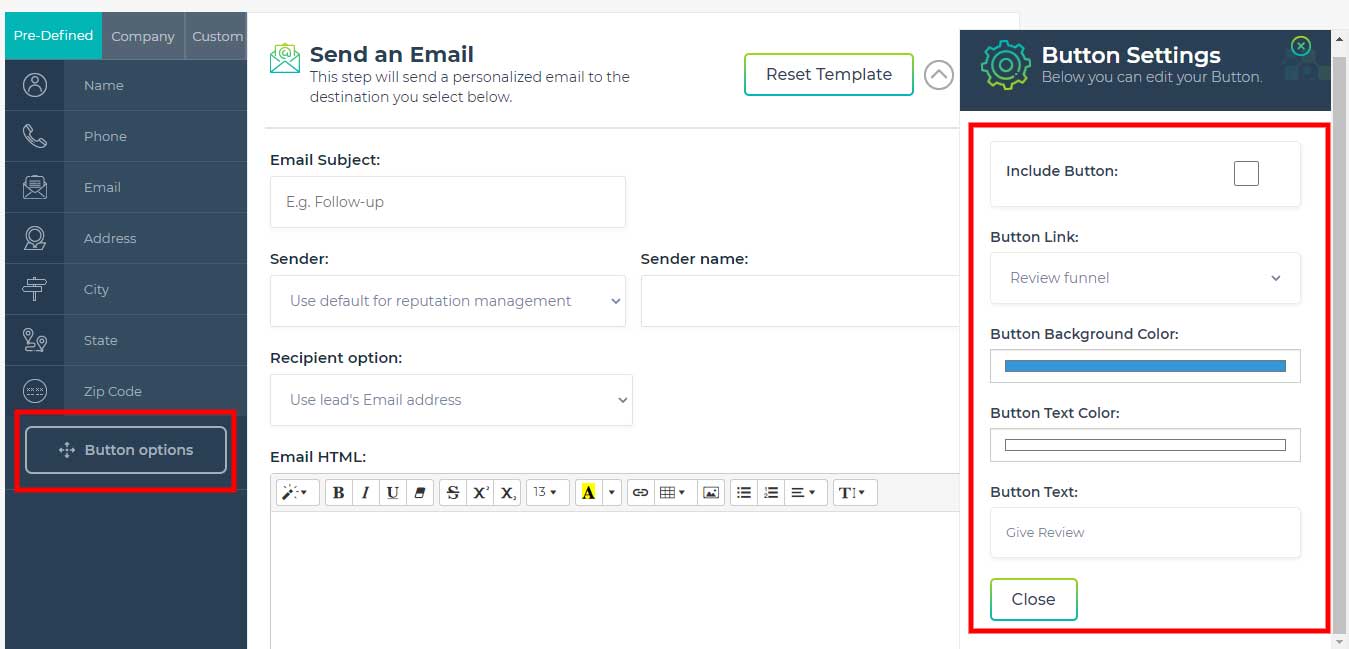
For emails and text messages, you have the ability to send a link with your message. For emails, these links can be included by using a button. Since text messages can’t contain buttons, you are limited to a normal website URL link. If your message is an email, then you will see the “button options” shown in the image below.

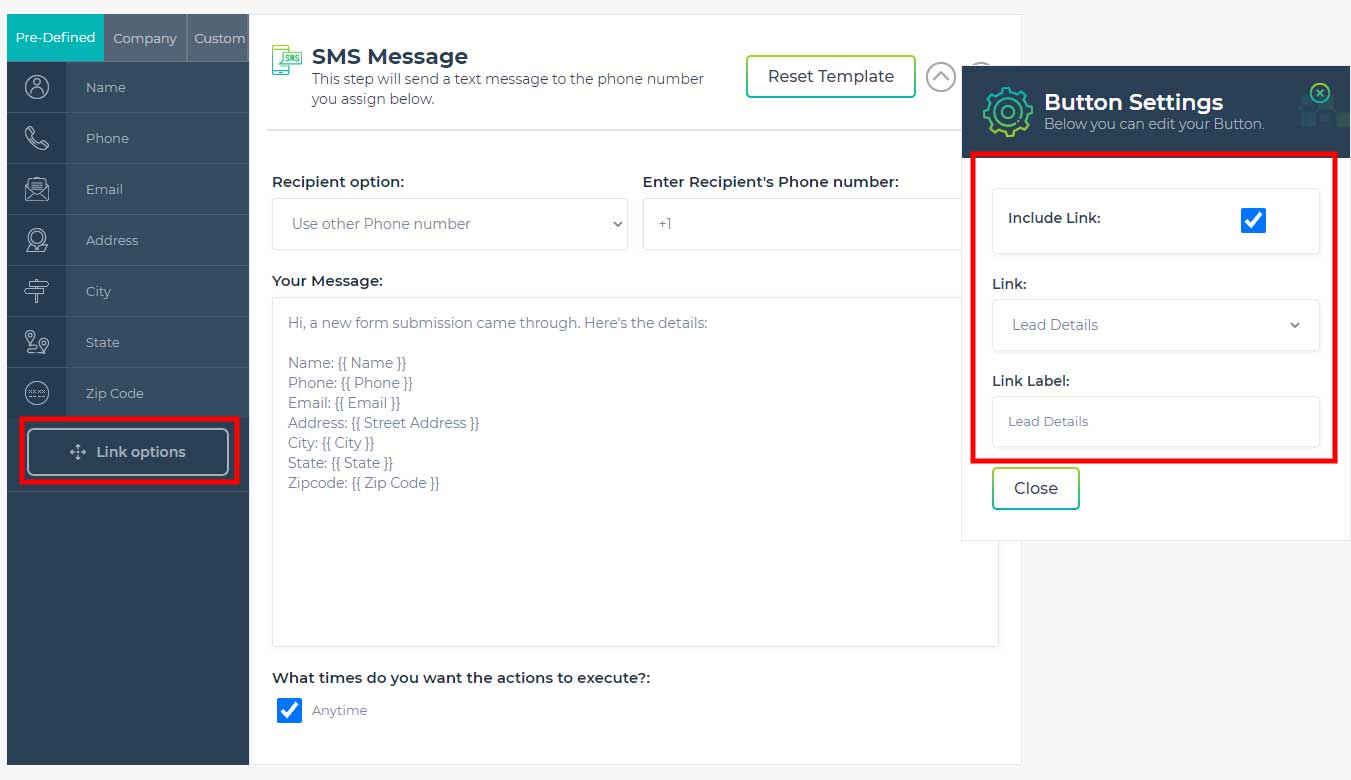
For text messages, the functionality is nearly identical but as you can see in the image below, this one says “link options.”

In either case, you can manage the behavior of the button or link through the menu that slides out from the right side. This window will be visible by clicking either the button options (email) or link option text messages.

Text Link Options

With the text message option, you can include a link by checking the checkbox. Next, you can choose between three options.

Review Funnel – Sends a link to the review funnel that is associated with the lead or contact.
Lead Details – Sends a link to the lead that is associated with the automation.
Other – Sends a link to another URL that you can specify here.
Email Button Options

We have all the same options for links as we do for texting, but we have a little more control since we are able to create buttons in emails that we are not able to create in text messages.

Review Funnel – Sends a link to the review funnel that is associated with the lead or contact.
Lead Details – Sends a link to the lead that is associated with the automation.
Other – Allows you to send a link to another URL that you can specify here.
Button Background Color – Allows you to select the background color of the button to be used with the link.
Button Text Color – Allows you to select the color of the text to be used within the button.
Button Text – Allows you to select the actual words or text to be used within the button.
Create New Automation

To start a new automation, expand the CRM item in the left navigation menu, then select “Automations”
This is the “All Automations” page. Here you will be able to create new automations as well as manage existing ones.

Starting an Automation

Automations can be started in two different ways: with a trigger or by being manually added to an automation.

Lead Detail Page

To start an automation from the “Lead Detail” page, expand the CRM item in the left navigation menu, expand ”Leads,” then select “All Leads”. Select the lead you would like to create an automation for, and click “View.”
You are now in the “Lead Detail” page. To start an automation click the “Add to Automation” button in the top right hand corner to the left of the “Delete Lead” button.


Contact Details Page

To start an automation from the “Contact Details” page, expand the CRM item in the left navigation menu and select contacts. From here, search for the contact you would like to create an automation for and open it up.
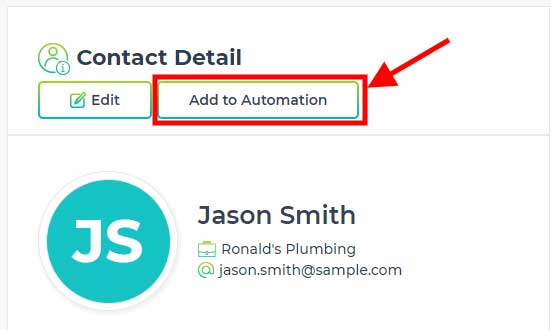
You are now in the “Contact Details” page. To start an automation, select the “Add to Automation” button in the top left hand corner of the page to the right of the “Edit” button.

All Automations Page

To start an automation from the “All Automations Page” expand the CRM item in the left navigation menu then select automations.
You are now in the “All Automations” Page. From here you can create a new automation by clicking the “New Automation” button at the top right hand corner to the right of the “Add to Automation” button.

Naming an Automation

To name your automation, you must first create one. From the “All Automations” page select the “New Automation” button. Then select which type of automation you would like to create from the selections provided.
After selecting what type of automation you will be creating, you will now be able to name it. The custom name field will be located at the top right hand corner of the page and labeled “Sequence Name”.

In Progress Automations

Automation History

You can view the entire history for a specific automation. To do this, start from the “All Automations” page, find the automation you would like to view the history of, then click the “History Logs” button located in the actions tab. This button is the second from the left, right next to the “In Progress” button.

Duplicate Automation

Duplicating an existing automation is very easy. Starting from the “All Automations” page, click the “Duplicate” button which is located in the actions tab. This button is the second from the right, next to the “Delete” button. Once you click duplicate, you will be prompted to name the new automation. After naming your copied automation, click “Duplicate”, then you will be directed to where you can edit your new duplicated automation.

Delete Automation

If you would like to delete an automation, start from the “All Automations” page, and click the “Delete” button that is located in the actions tab. This button is on the far right. After clicking the “Delete” button, you will be prompted to confirm you would like to delete that automation.

Government Compliance

Various governing bodies around the world have restrictions on automation related to phone calls, emails, text messages and unsolicited faxes. By using LeadSnap you assume responsibility for being in compliance with these rules and regulations. Failure to do so can result in legal ramifications that are your responsibility to resolve.

Google Analytics Integration

The Google Analytics Integration to LeadSnap was designed so that you are able to view all of your analytics data in one place directly associated with the company’s in the system. The reports produced by Google Analytics data contain valuable information and insight into user behavior so you can address business marketing concerns

You are able to see real-time data such as how many visitors are on your site and whether they are browsing from a computer or mobile device, traffic sources, site speed, and page indexing all in a single convenient dashboard. Connect any number of Google Analytics Accounts to LeadSnap for added flexibility.

How to Connect A Google Account

1. Expand the “Google” item from the left side navigation.

2. Expand the “Google Analytics” item from the left side navigation.

3. Select “Accounts”

4. Click the add account button on the main screen

5. Select Confirm on the “Are you sure you want to continue” Screen

6. Sign-into the google account that is connected to analytics.

7. After sign in select continue on “Leadsnap wants access to your google Account”

8. To add more accounts repeat steps 1-7.

How to Get to Google Account Mapping

1. Return to the google item on the left side navigation

2. Expand the “Google Analytics” item for the left side navigation

3. Select accounts

4. Locate your account on the main screen

5. Navigate to actions right of the account name and select edit mapping.

How to Edit Google Account Mapping

1. Determine what website(s) from google analytics you would like to import metrics for

2. In the “Enable” Column check the box for the website(s) you want to port metrics for

3. In the “LeadSnap Company” column select one of your companies from the drop down that you want to have this website associated with.

4. In the “Actions” column select assign to complete mapping.

How to View Google Analytics Account Data

1. Expand the “Google” item from the left side navigation

2. Expand Google Analytics

3. Select Dashboard.

To view company specific Google analytics results:

1. Navigate to “Select Company” in the upper right hand corner of the dashboard screen

2. Select from the drop down the company you want to see analytics results for.

How to Disconnect a Google Account From LeadSnap’s Google Analytics Integration:

1. Expand the “Google” item from the left side navigation.

2. Expand the “Google Analytics” item from the left side navigation.

3. Select “Accounts”

4. Locate the Google Account you would like to remove

5. Navigate to the “Actions” Column for the google account and select “Disconnect”

6. Select “Confirm” from the “are you sure you want to disconnect from this account” prompt.

Phone System Overview

The LeadSnap Call Tracking System is a cloud-based phone system that enables tracking for both calls and text messages within your business. It also allows you to build custom workflows based on your business needs. We offer local numbers—-often referred to as “tracking numbers”—in various countries around the world. The interactions that take place on these local phone numbers can be forwarded to your local phone or managed through the browser window when logged into your account.

The functionality of the LeadSnap phone system is limited to numbers that have been purchased within LeadSnap. Your LeadSnap account subscription comes with one phone number. To get started, just select the local phone number you would like.

Call Flow System

The Call Flow System allows you to build custom workflows based on your business needs. There is no limitation on the number of steps you can add in the call flow sequence. Check out the call flow support article for a deeper dive into how these work.

● Record Calls – By default, LeadGenerated will record calls. You can turn this off using the switch shown in the first step of your call flow. Those calls are available for review within the calls section of LeadGenerated.
● Greeting – Play a recorded message or have our automated system read text to the caller when they reach this step.
● Dial – Send a phone call to a designated number (or numbers) when the call arrives.
● Round Robin – Rotate the destination of the phone calls to various numbers based on weighted percentages that you decide.
â—‹ Example: Send 70% of phone calls to these two numbers and send 30% of phone calls to this other set of numbers.
● Menu – Allows the caller to press a button and get routed to a destination phone number.
â—‹ Example: Press 1 for sales, press 2 for support.
● Schedule – Allows for different actions based on the time of day when a phone call arrives.
â—‹ Example: Send calls to phone number A on weekdays from 8:00 am to 5:00 PM and send phone calls to phone number B during other time periods.
● Tags – Tag a phone call with a certain tag that can be used to organize calls in the system.
â—‹ Example: If the user presses 1 for sales, you can tag a call as a sales call.
● Voicemail – Play a recorded message or have our automated system read text to the caller when they reach this step. If you choose to use a voicemail, this will be the final step in the call flow sequence.
● Hang Up – End the call.

Automations

The phone system plays a strong supporting role for the automation functionality. Automations can be triggered by both phone calls and text messages. Text messages can be used as an action within the sequence.

Calls

In the calls area, you will find the call history for each of your tracking numbers. Any calls that have been recorded can be played back from the calls screen. You can use the filters at the top to limit the calls showing based on your own custom criteria. Check out the calls documentation article for more information.

Texts

Using your tracking phone numbers, you can send and receive text messages throughout the LeadSnap system. Texting options appear on the lead detail screen, the calls screen, the text screen, tasks, contacts and within the automations area as both actions and triggers. In addition, you can set notifications to be sent via based on your own custom criteria. Notifications and other system messages will come from the phone number set as the default SMS number within your account.

Browser Phone

You can make and receive phone calls through the browser. You’ll be required to allow microphone access to LeadSnap if you would like to take advantage of the browser phone. Throughout the system (lead details, contacts, calls, texts) you will see several options that say “dialer.” Calls can be made through the browser from any of these locations. In addition, within the phone system you will notice there is a browser phone option.

Outgoing Phone Calls:

Making an outgoing call through LeadSnap can happen either through the browser or through a local phone. In either case, the call will be made from the tracking phone number. If the person you’re calling is using caller ID, they will see the tracking phone number instead of your phone number.

Make Outgoing Phone Call

1. Select the company from which you would like to call from. You must have a tracking number within our system associated with this company to make an outgoing call.

2. Select the associated tracking number from the tracking number dropdown.

3. Enter the phone number of the customer you would like to call.

4. You will notice there is a “connect with your phone” checkbox. If you choose this option, then our phone system will first call your phone number. You will hear a recorded message asking you to press 1 to connect to the phone number specified. Once you press 1, our phone system will connect the call.

Phone Plans

Currently we have two types of plans—the plan that only includes the tracking phone numbers, and the plan that includes tracking phone numbers as well as all of the other functionality of the LeadSnap CRM. The latter comes with one free phone number, you just need to select your local area and activate it. Depending on the country you are in, the costs for minutes and phone numbers can vary. The pricing also varies depending on the plan that you choose, with the higher level plans providing bulk discounts for both numbers and minutes.

Edit Phone Number

1. Expand the Phone System item from the left navigation.

2. Expand Numbers from the submenu within the Phone System item.

3. Click All Numbers.

4. Click Edit next to the number you would like to edit.

Company – This is where you’ll assign the current number to a different company within LeadSnap.

Number Name – A nickname for the phone number.

Forward Calls To: – Enter the default phone number where you would like forward incoming calls placed to your tracking number.

Call Whisper – This turns on and off the whisper message for the receiver of the call.
Whisper Message – A message heard by the receiver of the phone call when they answer the call. The caller will not hear this message. From the caller’s perspective, the phone will continue to ring until the whisper message has been completed.

Use Call Flow – This allows you to choose if you would like to use a Call Flow for incoming calls or have the call forward directly to a phone number without the call flow work flow.

Call Flow Selection – Select the Call Flow that should be used by this phone number for incoming calls. Call Flows are implemented at the company level, so if you do not have one for a company, you can create one and then assign it to a phone number.

Call Recording – This turns on and off call flow recordings. If turned on, incoming calls will be recorded. This option is only available if Call \Flows are disabled. This will enable recording of incoming phone calls.  If a call flow is selected, this option is handled from within the Call Flow.

Call Greeting –  When turned on, our system will read an automated message to the caller of incoming calls. You can specify the message to be read in the text box. This text box will only be visible if the switch is enabled for call greeting. Thiscall greeting option is also only available if Call Flows are disabled. If a Call Flow is selected, this option will be handled there.

Port Number

Call porting allows you to import your tracking phone numbers from other carriers into LeadSnap. By law, every carrier is required to allow phone numbers to be ported out of their system. Once you have ported a phone number, you will no longer have financial responsibility to the previous carrier. It may be necessary to inform this carrier to cancel service on the phone number. Please ensure the phone number is within LeadSnap and functional before making this request.

Port Number Steps

1. Expand the Phone System item from the left navigation.

2. Expand Numbers from the submenu within the Phone System item.

3. Expand Port Number.

4. Select New.

5. Select the country from the drop down menu.

6. Agree to the terms through the checkboxes.

7. Complete the form with your phone numbers. Use the address on file associated with the current carrier where you will be porting the phone numbers from.

8. Provide the signed letter of authorization.

9. Include a billing statement from your current provider.

User Roles

User roles allow you to restrict what users can view, edit, create and delete. The process is pretty simple but will give you a lot of flexibility and control over user access.

Create a User Role

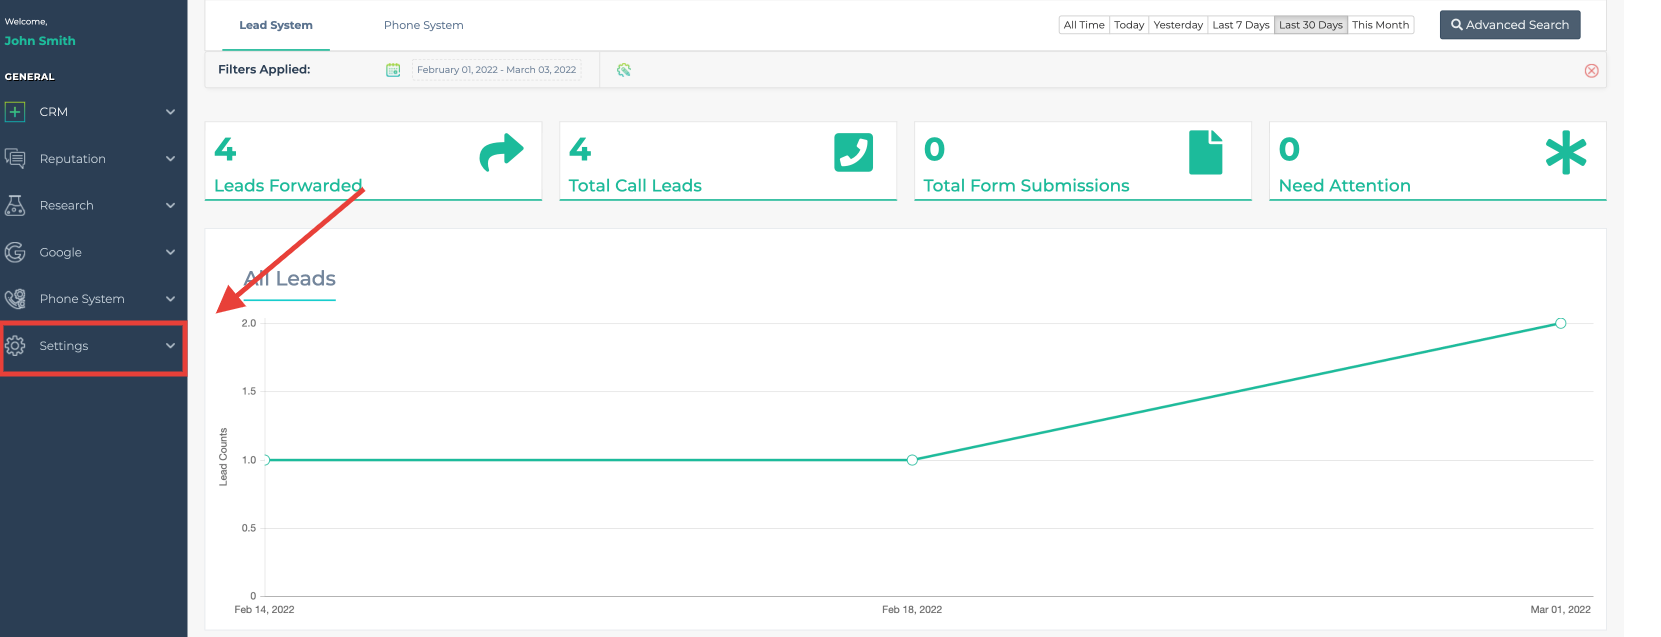
1. Expand Settings from the left navigation.

2. Expand the Users Menu.

3. Select User Roles.

4. In the top right corner click the new role button.

5. Name the user role.

6. Edit user role by clicking the eyeball icon next to your newly created user role.

7. Select the permissions that you would like the new user role to have.

A. Notes:

  • Notice the list of permissions line up with the left navigation items. Once you enable a section like CRM you will see the associated permissions within the CRM permission area. 
  • Some permissions like for leads work on a user and a company level. So for instance any permissions you give to a user will only be available for the companies they have access to. 
  • As you select permissions they are saved in real time so there is no need to save things before you leave. 
  • if you attempt to change the user role that is currently assigned to users you will receive a popup notification alerting you to the users that whose permissions will change by this action. 

Assign a User Role

There are two ways you can assign a user role to a user. You can make the assignment at the time the user is created or you can edit an existing user.

Change User Role Name

1. Expand Settings from the left navigation.

2. Expand the Users Menu.

3. Click the pencil icon.

4. Update the name to your new name.

Delete User Role

1. Expand Settings from the left navigation.

2. Expand the Users Menu.

3. Click the bin icon.

4. Confirm deletion of User Role.

Add Email Account

LeadSnap sends emails for a variety events throughout our system. By default the emails come from [email protected]. We understand that this probably not desirable in many cases so we have provided you the ability to add your own email accounts to our system. Some of the common cases where you may want to send emails from your email instead of the LeadSnap default email are:

  • Delivering leads to you or your clients
  • Review requests
  • Questionnaire emails

Adding an Email Account

To add an email account expand settings from the left side navigation.

Select Email

From the top right corner click the “Add Email Account” button.

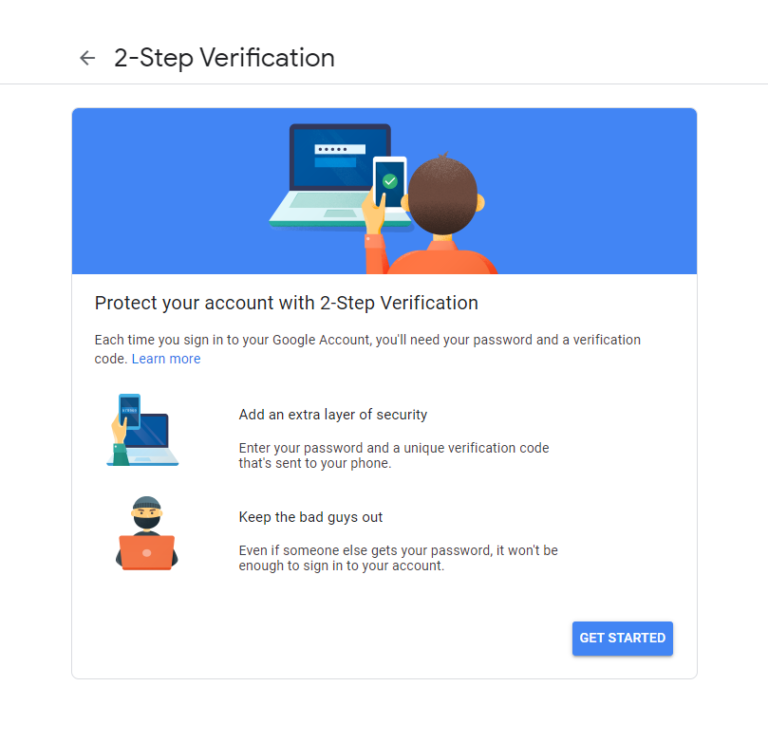
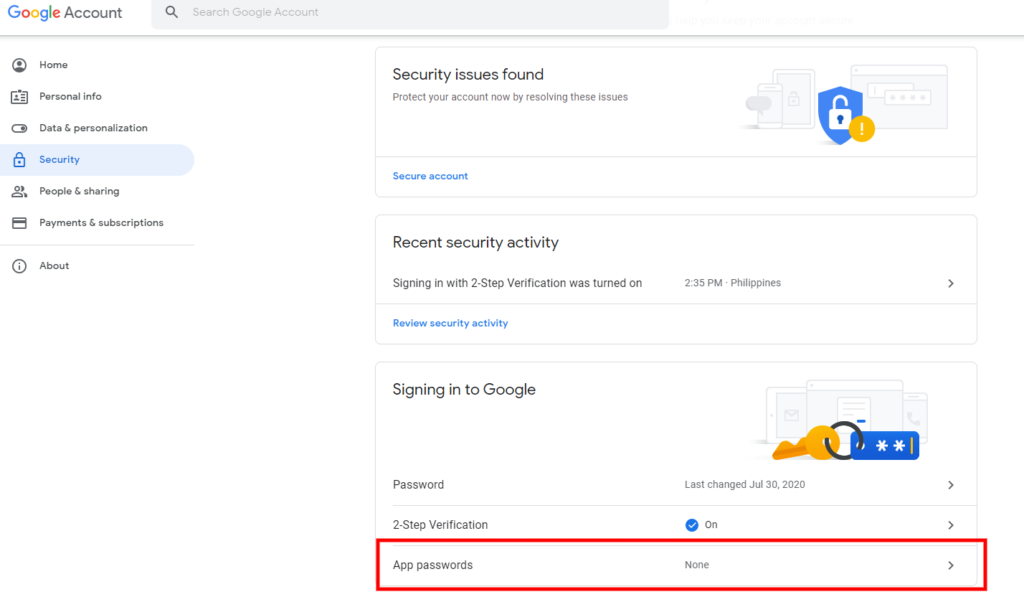
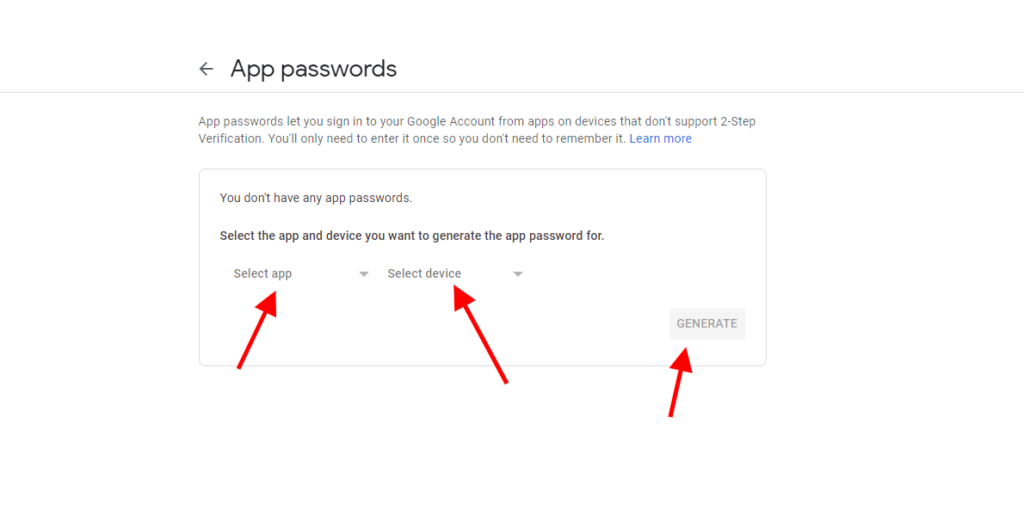
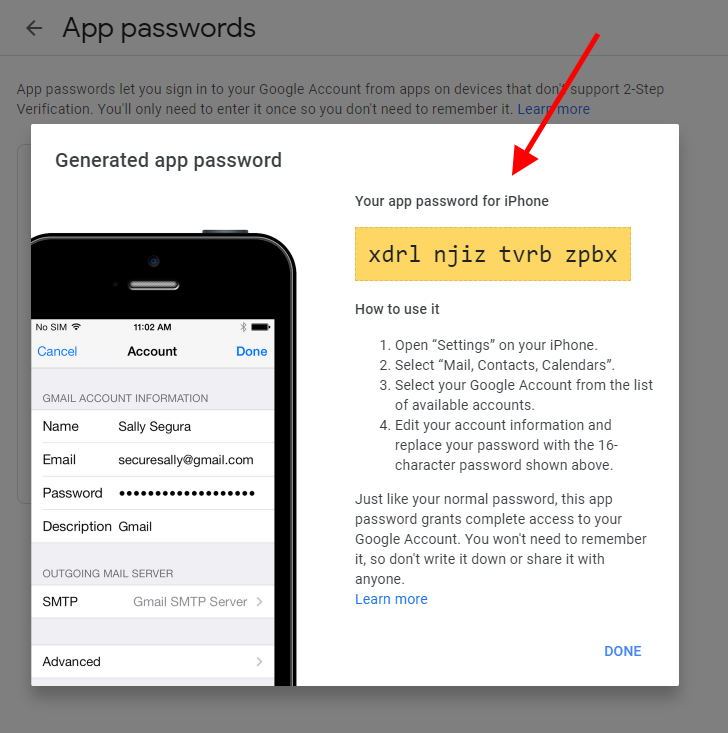
Select your email provider from the drop down list. If you do not see your email provider on the drop down list, select “Other”. When using the “Other” option you may need to contact your host to get the SMTP settings associated with your email account. Check out our SMTP settings article for the SMTP settings for some of the most popular website hosts. When using Gmail there are some additional steps required. This guide will walk you through the settings necessary for Gmail.

After completing the email settings click the “Validate” button to ensure we are able to access the email account with your settings.

Assuming your connection is successful you should see a message like this:

After a successful validation message it is a good idea to send a test email by clicking the “Send Test” button.

In the popup menu enter an email address where you can receive our test email message. If you did not receive the email test, please check your spam email. The test email should be from the email address you just added to our system.

After receiving the test email message you can now save the email address to our system.

Once the email address is saved to our system you can start send emails from our system for Lead Emails, Review requests and Questionnaires.

For Gmail and Gsuite there are some special settings to make in order to get things to work correctly. You can find out more about these settings within this article.

Gmail/Gsuite Email Settings


Check out these articles for more information about sending emails for the associated modules.

Email Settings for Leads

Email Settings Reputation Management Module

Email Settings Questionnaire Module

Lead Management Email Settings

Among the many important functions of the lead management module is delivery leads from any incoming source to its assigned user. One of the ways this delivery can happen is by email.  In this article we are going to discuss how to adjust the email address used in the delivery of these lead emails. We are assuming that you have are familiar with how to add an email account to LeadSnap. If that is not the case please see the support article.

After successfully adding an email account to LeadSnap you can assign the email account to be used for lead delivery on a company level. This assignment can happen from two different locations. The lead management tab of the email settings page as well as the email settings tab of the edit company page.

Method 1: Email Settings

Using the email settings page you can map more than one company at a time to an email account. To map an email account to a company using the email settings page follow these steps:

  1. Add an email account to LeadSnap.
  2. Expand settings from the left navigation.
  3. Select Email.
  4. Select the Lead Management tab from the top horizontal navigation.
  5. Find the company or by scrolling through the list of companies or using the search bar in the top right corner.
  6. Select the new email address from the drop down list associated with the company.
  7. Add the sender name by clicking the pencil icon and typing in the name to be used for future lead emails for this company.
  8. Type the subject of the email to be used for future lead emails for the company.
  9. Click the save button in the top right corner.

Using the Bulk Apply

The bulk apply allows assigning an email address to more than one company at a time.

  1. Select the checkboxes next to more than one company.
  2. Select the email account you wish to assign to the selected companies from the bulk apply dropdown box.
  3. Click save to apply your changes to the selected companies.

Method 2: Edit Company

The second method for assigning an email account to a company can be done from the edit company screen.

  1. Add an email account to LeadSnap.
  2. Expand settings from the left navigation menu.
  3. Expand the companies sub-menu item.
  4. Select all companies.
  5. Select edit next to the company for which you would like to update the email account.
  6. Select the email settings tab.
  7. Choose the email account from the dropdown list next to lead management.
  8. Click the update button.

Reputation Management Email Settings

The reputation management module provides a system to simplify and automate the review request process. One of the main ways those review requests can be delivered is through an email. Using an email address that is consistent with the company that provided the service will increase the conversion rate of the review requests.  We are assuming that you have are familiar with how to add an email account to LeadSnap. If that is not the case please see the support article.

After successfully adding an email account to LeadSnap you can assign the email account to be used for the review requests on a company level. This assignment can happen from two different locations. The reputation management tab of the email settings page as well as the email settings tab of the edit company page.

Method 1: Email Settings

Using the email settings page you can map more than one company at a time to an email account. To map an email account to a company using the email settings page follow these steps:

  1. Add an email account to LeadSnap.
  2. Expand settings from the left navigation.
  3. Select Email.
  4. Select the Reputation Management tab from the top horizontal navigation.
  5. Find the company or by scrolling through the list of companies or using the search bar in the top right corner.
  6. Select the new email address from the drop-down list associated with the company.
  7. Add the sender name by clicking the pencil icon and typing in the name to be used for future review request emails for this company.
  8. Type the subject of the email to be used for future review request emails for the company.
  9. Click the save button in the top right corner.

Using the Bulk Apply

The bulk apply allows assigning an email address to more than one company at a time.

  1. Select the checkboxes next to more than one company.
  2. Select the email account you wish to assign to the selected companies from the bulk apply dropdown box.
  3. Click save to apply your changes to the selected companies.

Method 2: Edit Company

The second method for assigning an email account to a company can be done from the edit company screen.

  1. Add an email account to LeadSnap.
  2. Expand settings from the left navigation menu.
  3. Expand the companies sub-menu item.
  4. Select all companies.
  5. Select edit next to the company for which you would like to update the email account.
  6. Select the email settings tab.
  7. Choose the email account from the dropdown list next to reputation management.
  8. Click the Update button.

Questionnaire Email Settings

The questionnaire module makes it easy to gather information from our clients or prospective clients. First, we build our questionnaire using the LeadSnap form builder. Next, we send an email that contains a link to our questionnaire. When the user clicks on the link they are taken to the questionnaire that gathers the requested information and saves it safely in our system. By default, this questionnaire comes from [email protected], which we realize may not be ideal in all situations. You are free to customize this to your own email account and have those requests come from an email address that your client will recognize. The first step is to add an email account to LeadSnap.

After successfully adding an email account to LeadSnap you can assign the email account to be used for the questionnaire delivery on a questionnaire level. This assignment can happen from the edit questionnaire page.

Assign Email Account

There are two prerequisites before assigning an email account to a questionnaire. First, you must have already added the email account to LeadSnap. Second, you must have an existing questionnaire. To map an email account to a questionnaire follow these steps:

  1. Expand Questionnaires from the left navigation.
  2. Select All Questionnaires.
  3. Select Edit next to the questionnaire for which you would like to update the sending email account.
  4. Select the new email account from the “Sender Email” drop-down box.
  5. Click the submit button to save the new email settings for the questionnaire.

Heat Map Overview

The heat map tool provides a color-coded grid with numbered rankings for your Google My Business across a local geographical area. You will notice in the heat map example below the rankings range from 1 (bright green) to 20 (dark red). The circles that have 1 signify that if the Google search was performed in this location for this keyword the associated Google My Business (GMB) would have the highest ranking spot within the maps section of the search result.

Heat Map Example Results

GMB Map Area

Before we continue to explain the fine details and customizations that apply to the heat map tool let’s make sure we are all on the same page.

There are several areas in any given Google search result and those areas change depending on several factors. If Google is able to determine that there is local search intent, such as “Plumber Near Me” then they will show the maps or Google My Business area of the search results. You will see what this map area looks like in the picture below.

For local search, the GMB area holds the highest value with different studies showing 50-70% of the total clicks on a search result happening in this area alone.

Proximity is a major factor in your ranking within the GMB area of the search result. Google is more likely to show searchers who are closer to the address where the GMB was originally verified. This makes sense though right? If you were looking for a local restaurant you would probably be more interested in the places that are near you then ones that across town.

This means if you do a search from one spot for a local term and then you go a few miles down the road you might get very different search results.

There are many things that will influence your ranking within the coveted GMB area. The heat map tool provides an abundance of valuable information about local rankings. From checking your current results to researching the competition and doing niche research this tool can provide critical information for any local business.

Map Area Example

How does it work?

First, you define the Google My Business that you would like to evaluate. There are several ways to do this and we will cover more of these in a little bit.

Next, you choose a keyword that you would like to analyze for the chosen GMB  you provided in the first step.

From here there are many different ways to define the area you would like to perform your search. You may want to search the entire Chicago area or maybe just a small suburb. We have built our tool in a way where you can define the exact area and dimensions of your search.

The zoom level corresponds with Google’s zoom level in its search results. This is an advanced topic that we will cover in more detail later. Luckily we have an auto-selection which is in many times the best choice unless you are an advanced user.

The Heat Map Search Fields

To run a heat map search first you are going to need to fill out the little form so the heat map knows how to perform the search.

Heat Map Input Fields

The search results are performed on a specific Google My Bussines (GMB). The “find by” field is where you define the specific GMB you will be evaluating during the search. There are 4 options for choosing this location.

Google Search

The first and easiest one is Google Search. You can simply type in the name of that was used for the Google My Business and select the from the list of matching results. Unfortunately, this will not work for many business types and you may need to resort to one of the other methods to locate the GMB you would like to evaluate.

Map URL

Each Google My Business has a unique map URL that can be used to identify it. There are many ways to find this URL, we will show you one that will always work. You can find the map URL for any business, which is great for researching the competition.

1. Select the Map URL option from the top control.

2. Enter this URL in your browser: https://www.google.com/maps

3. Enter the exact name of the Google My Business you would like to evaluate in the top left corner. As you type in this field Google will search it’s listed of verified businesses. When you see the name of GMB, select it.

There are a few reasons that you may not see your Google My Business show up on the list. If the GMB was only just verified it may not be listed here yet. If your GMB is not verified, has a status of pending, or suspended it will not show on the list. For those situations, you will need to address those issues before you take advantage of this tool.

After selecting the company you should be on a screen similar to this one:

4. The next step is to click the share button

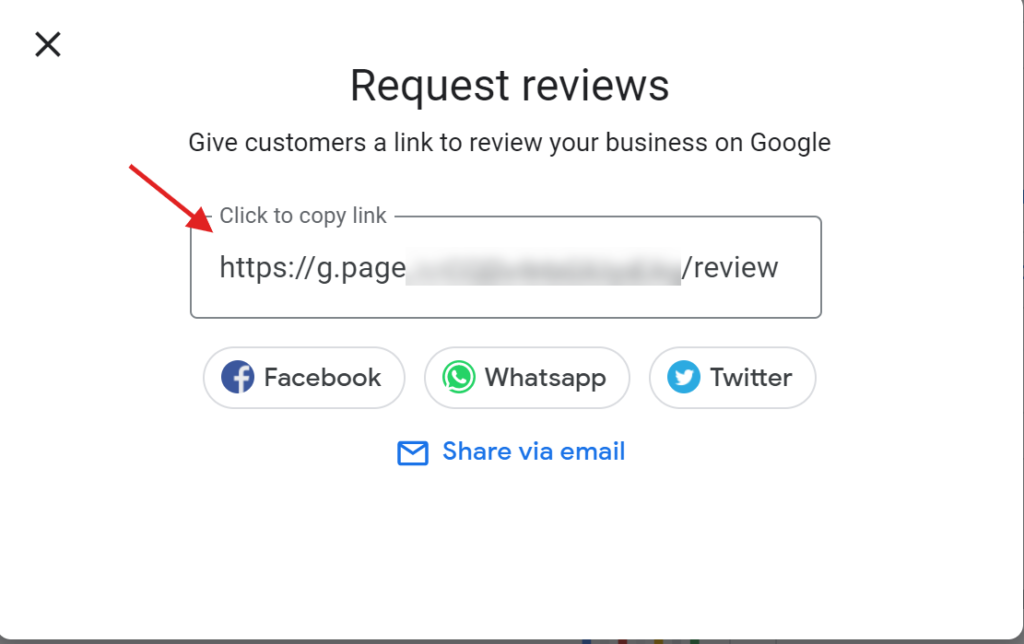
5. Click the copy link button from the popup menu

6. Now that you have this link copied you need to post it into the browser address bar and hit the enter button on your keyboard. 

After you hit the enter button Google will immediately redirect to another URL. This is an example of the URL after Google Redirects. This is NOT the Map URL

https://www.google.com/maps/place//data=!4m2!3m1!1s0x80998f4d70d041bd:0xac7634c26565b1c3?source=g.page.share

After a few seconds Google will redirect to a different URL. This one is your Map URL. Below is an example of a valid map URL. Notice it does NOT  have the word share at the end of it.

https://www.google.com/maps/place/Shivvy’s+Bear+Removal+Pros/@38.8795213,-120.1600487,11z/data=!3m1!4b1!4m5!3m4!1s0x80998f4d70d041bd:0xac7634c26565b1c3!8m2!3d38.879605!4d-120.0199645

7. Copy the Map URL from the address bar of your browser

8. Paste the Map URL into the Find By Field (make sure you have Map URL selected in the top control)

Google Place ID

Each Google My Business has a unique map Google Place ID that can be used to identify it.

  1. Select the Google Place ID option from the top control.
  2. Paste in the Google Place ID

My GMB

The My GMB option in the Find By control works with GMB’s that you have added to your LeadSnap account. If your GMB is not showing on the list that it has not been added to your LeadSnap account. To populate this list connect the Google Account that is associated with the GMB.

  1. Select My GMB from the Find By control.
  2. Type a few letters of your GMB or select the GMB you would like to perform the heat map search from the list of added GMBs.
  3. Select the desired GMB

Keyword

The keyword is the actual search term the heat map will analyze. Any slight variation in a search term can yield completely different results. In this box enter the keyword for which you would like to evaluate the rankings. Currently, we have the option to search 1 keyword at a time.

Grid Size

The grid size allows you to determine how many points you would like to check on the map. The number represents how many points go horizontally across the screen and how many go vertically.  You see in the selection below we have chosen a 3 by 3 grid.

Miles and Meters

The meters/miles control directly relates to the grid size control.  This is the distance between the points on the grid. You have many options for setting the distance. You can use the Metric system or the US Customary Units system of miles. To toggle between the miles or meters click the switch bar at the top. Note you can also set the size of your grid by drawing a square or polygon using the custom grid controls explained in detail later in this article.

This corresponds with the zoom level from Google.

Custom Grid Controls

The custom grid controls are three buttons located at the top of the map area that can provide some additional precision when defining the area for a heat map search

These controls are meant to be used after you have already filled out the heat map search settings field above the map. You can use these settings to change the size, shape or positioning of where the heat map search will be performed.

The Hand Grabber Tool

The hand grabber tool allows you to reposition the map by clicking and dragging the map. To use this tool first select the hand icon located at the top of the map. Next, click into the map, keep the mouse button down, and the mouse. You will notice the hand pulls the map as you drag

Draw Shape Tool

The draw a shape tool allows you to create a custom shape and size for the heat map search. The first point you make in the map needs to connect with the last point in the map to close the shape.

  1. Click the draw a shape tool button within the heat map.
  2. Click a point on the map with your mouse. For this one, do not hold down the mouse button just click and release.
  3. Click another point and release the mouse button. Each time you click down it will draw a line from your previous point to your new point.
  4. Continue creating new points until you have closed the shape by connecting your first point and the last point.
  5. You can then click the start heat map button to begin your heat map search.

Rectangle Tool

The rectangle tool allows you to draw rectangles for your heat map search.

  1. To use this tool first select the rectangle tool from the buttons at the top of the map area.
  2. Next, click a spot in the map area with your mouse and drag the mouse to draw your rectangle.
  3. After you have the shape of your rectangle release the mouse and the grid points will be moved to fit inside the area you have defined.
  4. You can then click the start heat map button to begin your heat map search.

Heat Map Averages Tab

The graph is really pretty with all the colors and the map, but wouldn’t it be great if we could see the hard numbers from the graph? That’s exactly what the averages tab provides for you. You can access by clicking on the tab in screenshot below.

How does the average work?

You will notice that each grid point has a number, that is ranking for the specific company within the GMB area of the search results for the given search term if it had been performed at the location it aligns with on the map. As you can see in the image below we have created a 3 by 3 grid which means there are 9 different grid points on the map. If we total the score from each of these grid points we will get 28 points. To calculate the average we divide the total points of 28 by the number of spots there are on the grid. 28/9 = 3.11.

What is Top 20?

Our heat map only tracks the top 20 positions for each point for any given search term. The top 20 field shows you how many times this company appeared within the top 20 for the given heat map. So if you run a 9 x 9 grid there are 81 available grid points. If they appear in the top 20 for every grid point then you will see a result that says 81/81.

Northwest, Northeast, Southwest, Southeast

For these columns, we are giving you the average score but only for 25% of the grid at a time.

Northwest – Top left 25% quadrant of the map

Northeast – Top right 25% quadrant of the map

Southwest – Botom left 25% quadrant of the map

Southeast – Bottom right 25% quadrant of the map