Keyword Lists

What Are Keyword Lists?

Keyword lists allow you to automate the heat map for your chosen terms in a predefined area. Ranking well for one keyword is great but to really have a positive impact on the number of leads we need to rank for multiple keywords. Rather than having to run a heat map and wait and then run another and so on we created keyword lists. Our system will run a heat map for each keyword on your list one after another. You can take advantage of the keyword list functionality through the create heat map screen or through our scheduling screen.

Where are the Keyword Lists?

To access the keyword list open the heat map area of the application

1. Expand research from the left navigation menu.

2. Select GMB Heat Map.

3. Choose the Keywords tab from the top horizontal navigation.

The Keyword List Screen

The numbered items below correspond with the number photo below.

  1. Click this button to create a new keyword list.
  2. Enter the name of your keyword list.
  3. Enter the keyword or phrase and then hit the button that says “Add Keyword”. You can only add one keyword at a time but you can use phrases for your keywords if you like. Make sure to save your list before leaving this page with the save button below this area.
  4. This area shows the list of keywords currently added to this list.
  5. Click this button to delete the selected keyword list.
  6. Use the drop down button to select the keyword list to review or edit.

Using Keyword Lists

As mentioned earlier the keyword list can be used from two different areas within the application. The two areas are the create new heat map and the scheduling page.

Create New Heat Map

Schedule Heat Map

My Heat Map Location is Weird

Why is this happening?

By default, our heat map tries to pick a location in the center of your service area. This means if the service area defined by your Google My Business is a large area the center or the default selected area could be in a location that seems strange. The good news is you can search in any area you like and redefine the size, shape, and location of the search grid from within the heat map tool.

Let’s look at an example of this in action. In the picture below you can see the company, Treeco Tree Specialists has selected within their GMB settings a very large service area covering most of southern California.

We can see in the next photo below that LeadSnap has selected a central location as the default location of this search.  As this location is not so close to the actual location where the GMB was created and it is a less populated area this may not be where we would like to perform our search for this heat map.

Adjust Heat Map Location

We can easily change the location using the custom grid controls.

Custom Grid Controls

Check out this short video for a more in-depth look and video walk-through on how to make the adjustment to the correct area for your heat map search.

Video Walk Through

Deactivate Company

LeadSnap works on a credit basis for the lead management, reputation management, and GMB management modules. As you activate a credit in one of these modules the credit is deducted from the credit balance in your subscription. If at some point you would like reclaim the credit and release the connection between the module and the selected company you can do this through the company info tab of the company dashboard.


Step By Step Guide

1. Expand the Settings option from the left navigation menu.

2. Expand the companies sub-menu from within the settings menu item.

3. Select “All Companies”.

4. Click the view button next to company you wish to adjust.

5. Select the “Company Info” tab.

6. Chose Deactivate next to the selected module.

7. Confirm by entering your account password. This process is irreversible.

Qualified Call Filters

The default behavior for phone calls arriving in LeadSnap is to hold them in the all calls area and not add them as leads. This allows you to preserve an accurate lead count within the leads section of LeadSnap and not have your leads be watered down by telemarketers. In a sense, your calls are held in a quarantine area until they are moved to the leads area. This process can be done manually or automated.

Manually Add Call

Click “add as lead” from the calls page. This converts the call to a lead and moves it to the various lead pages throughout the application.

  1. Expand Leads from the left navigation.
  2. Select “All Calls”.
  3. Click the “Add as Lead” button.

Qualified Call Filters

The qualified call filters automate the process of moving calls to leads based on the rules that you set. This is done on a company level from the edit company screen.

  1. Expand settings from the left navigation.
  2. From within the settings menu expand companies and then select all companies.
  3. Click edit next to the company for which you would like to adjust the qualified call filters.
  4. Navigate to the Qualified Call Filters area.
  5. Select and adjust your filters.
  6. Click update to save your updated call filters.

For calls to be added as a lead they must meet all the selected qualified call filters. To add all calls as leads enable the call filters without any of the call filter selections.

  • Qualified Call Filters Enable – This enables or disables the qualified call filters.
  • First Time Callers – When this is enabled calls from first-time callers only will be added as a lead.
  • Call Duration – Only calls with a duration greater than the specified time will be added as leads.
  • Answer Status – Only calls that have a status matching the selected calls will be added.
  • Phone Number Area Code – Only calls that match one of the selected phone number area codes will be added as leads.

Gmail and G Suite Settings

This guide will help you connect your Gmail or G Suite email accounts to LeadSnap within our SMTP settings area. Depending on the specific account settings within your Gmail or G Suite account one or both of these steps may be necessary. To learn more about SMTP settings please read the associated support guide.

Reputation Management SMTP

  1. Expand Reputation Management from the left side navigation.
  2. Click Email.
  3. Select the SMTP Settings tab.

Allow Less Secure Apps

Here is an article from Gmail that explains more about the process.

While logged into your account this link should take you to the area to adjust the settings.

Google App Password

As an extra level of security Google has a feature that you can use with its products (such as Gmail) called app passwords or app-specific passwords.  The way this works is you can create a unique password for each application (in this case LeadSnap), this will not affect the main password for your account. You then use this password just like you would your normal password within the chosen application. In a sense, it is like an alternative password that will only apply to one application.

For more information about how to set this up please check out this support article from Gmail: App Passwords.

SMTP Email Settings

The SMTP settings tab within reputation management allows you to send a review request from any email address that you select. This is important because if you try to request a review from LeadSnap and the customer does not recognize our company they are unlikely to provide a review.

In order for this to work properly, you must authenticate your email address in our system. Below is a list of common hosting companies and email providers that you can you use for our settings.

With Gmail, it may be necessary to take some extra steps in order to authenticate properly. Please check out this guide: STMP settings for Gmail and Gsuite.

SMTP Settings Explained

  • Enable SMTP – In order to take advantage of the SMTP email system, you must enable it here. These setting apply on a company level.
  • Email Address – Enter the email address you would like to send review requests from.
  • Password – Enter the password for the email account that you would like to send review requests from.
  • Sender Name – Enter the name you would like displayed in the review request email.
  • Host – Enter the SMTP host settings. This will be different depending on your email host. If it is a branded email account such as [email protected] the email account is usually controlled by the web host (in this case wherever bobsplumbing.com is hosted). If you are using Gmail, Outlook, Hotmail, etc. they have their own SMTP settings. We have listed many of the common providers in the table below.
  • Outgoing Port – This can vary depending on the level of security you are using and the email host. Port 25, 587, and 465 are commonly used.
  • Security – The type of security you would like to use for your email server. This will vary depending on your host and this choice will affect the port number.

Common SMTP Settings

PROVIDER

URL

SMTP

1&1

1and1.com

Smtp.1and1.com

Airmail

Airmail.net

Mail.airmail.net

AOL

Aol.com

Smtp.aol.com

AT&T

Att.net

Outbound.att.net

Bluewin

Bluewin.ch

Smtpauths.bluewin.ch

BT Connect

Btconnect.com

Mail.btconnect.tom

Comcast

Comcast.net

Smtp.comcast.net

Earthlink

Earthlink.net

Smtpauth.earthlink.net

Gmail

Gmail.com

Smtp.gmail.com

Gmx

Gmx.net

Mail.gmx.net

HotPop

Hotpop.com

Mail.hotpop.com

Libero

Libero.it

Mail.libero.it

Lycos

Lycos.com

Smtp.lycos.com

O2

o2.com

Smtp.o2.com

Orange

Orange.net

Smtp.orange.net

Outlook.com (former Hotmail)

Outlook.com

Smtp.live.com

Tin

Tin.it

Mail.tin.it

Tiscali

Tiscali.co.uk

Smtp.tiscali.co.uk

Verizon

Verizon.net

Outgoing.verizon.net

Virgin

Virgin.net

Smtp.virgin.net

Wanadoo

Wanadoo.fr

Smtp.wanadoo.fr

Yahoo

Yahoo.com

Mail.yahoo.com

Zapier to ClickSend SMS

  1. Expand the Settings menu item on the left navigation within LeadSnap.
  2. Select Integrations.
  3. Select Connect Zapier.
  4. Select the company from the dropdown that you would like to connect with Zapier.
  5. Copy the Zapier Connection key to your clipboard.
  6. Log in to your Zapier account (in a new tab).
  7. Click the “Make A Zap” button.
  8. If you have not accepted the invite from LeadSnap please click here and accept the invitation.
  9. Type LeadSnap in the search app field.
  10. Select the LeadSnap application.
  11. Within the Trigger Event dropdown box select New Lead.
  12. Click Continue.
  13. Choose Account and then add new account from dropdown within Zapier.
  14. Paste the API key into the Zapier popup window.
  15. Click the “yes, continue” button in the popup window.
  16. Click the Continue button back within the main Zapier window.
  17. Click the test trigger button and confirm that Zapier was able to successfully bring in a previous lead for this company from LeadSnap.
  18. Click Continue.
  19. Search for ClickSend SMS within the “Choose App & Event” search box.
  20. In the “Action Event” search box select “Send SMS”.
  21. Click Continue.
  22. Select your new account for ClickSend SMS or create a new account if necessary.
  23. Click Continue.
  24. Enter the information to customize the SMS message. (notice that when you click into a field Zapier will present you with the data from the test lead it found during the previous step from LeadSnap. )
  25. Map the test lead info to the areas within the Customize SMS window.
  26. Click Continue after customizing your SMS message.
  27. Click the Test and Review button to confirm your settings are correct and make any necessary adjustments.
  28. Name your zap in the top left corner.
  29. Turn your zap on with the toggle switch in the top right corner.

Zapier Overview

LeadSnap Zapier Integration

Click here for the invite link to LeadSnap

What is Zapier?

Zapier is a third-party company, that integrates with more than 2,000 different applications and can extend the functionality of LeadSnap in many directions. To get started you must have a Zapier account, you can sign up here: https://zapier.com.  Zapier works on triggers for events. So the basic is, you create an action or a series of actions that happen when a certain event is triggered. It’s a very powerful system, you can use conditional logic, make exceptions, do calculations. If you want to do something where there is predictable data there is a good chance that Zapier can automate the process for you.

  • Zapier is the glue that connects thousands of web apps.
  • Zaps are workflows that connect your apps, so they can work together.
  • Zaps start with a trigger—an event in one of your apps that kicks off your workflow.
  • Zaps automate tasks in the background.

Zap

A Zap is an automated workflow between your apps. For example, you may have a Zap that saves your Gmail attachments to Dropbox and another Zap that saves emails that you star in Gmail to a text file. Zaps consist of at least two parts: a trigger and one or more actions.

Trigger

A trigger is an event in an app that starts the Zap. Once you set up a Zap, Zapier will monitor the app for that event. For the save Gmail attachments to Dropbox example, you can receive a lot of emails through your Gmail account, but the Zap isn’t triggered until an email contains an attachment.

Action

An action is the event that completes the Zap. For the save Gmail attachments to Dropbox example, the action is uploading the attachment from your email to Dropbox.

Lead Management Overview

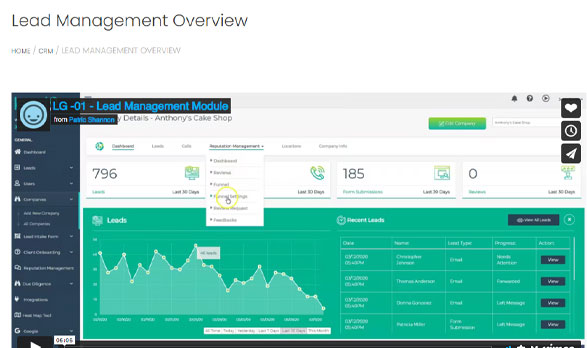
The lead management module is the most extensive module within LeadSnap. It is responsible for connecting LeadSnap to your websites as well as the integration with the phone system.

This module provides a broad array of powerful and customizable reports and filters. You can view all your companies or clients at once or the associated client or company level dashboard for each. The all leads screen puts all your leads in one place and allows you to apply filters and view your data based on what you decide is important.

There a lot of moving parts and there a few things that you will want to set up before you get started with things. If you are just getting started with this module it is recommended that you go through the Lead Management getting started section.

Company

Companies are created to track the leads for each of your websites. So for example, say you have that you would like to track leads for called ABC Towing. To get started you would create a company called ABC Towing within LeadSnap. Next, connect your website and phone system to this company as well as assign your company a client.

The company settings page will allow you to control if leads are manually or auto-forwarded to your clients as well as which calls should automatically be considered leads.  For each company (or website), you can decide what information you would like to save on the leads that come into our system. This is done through what we call website forms which is just a simple form that gathers lead information.

Client

A client is your client that is most likely and hopefully paying for the leads or SEO service that you are providing. As leads flow through our system they are tracked and forwarded to your clients based on the associated client and company settings.

Website Forms

A website form is a form that saves information about your incoming leads into our system. To ensure the form submission from your website goes into the correct places in our system it is important to map the fields in your associated website form with the website fields.  You can re-use the same form for all your companies or create a new one for each of your companies. These forms are completely customizable using our form builder and it is not necessary to have all the fields within your website form on the form on your website.

The fields that you create in your website forms are the same fields that are available in the columns and filters on the various leads pages, such as the “all leads page”, “company dashboard”, “client dashboard”.

Lead Flow

As leads flow from your website to your client whether through a form submission or a phone call LeadSnap will play a different role.  Check out the Lead Flow guide to help you understand how this works so you can optimize things for your specific needs.

Spam

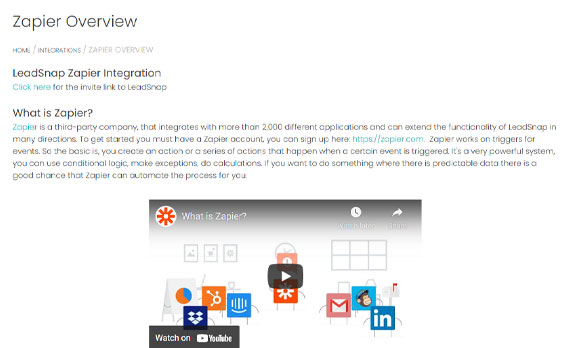
There are many ways that leads can flow into our system from form submissions to phone calls, emails, or a custom integration through a Zapier connection. For many of these such as form submissions, there is a constant battle with people spamming us or selling our services. LeadSnap has gone a long way to automate dealing with these people. For form submissions, we have created some very powerful and customizable spam filters. For the phone calls we have the qualified call settings which are available within the company settings screen.

Website Connection (Form Submissions)

It is important to get your form submissions coming into our system for many reasons. This connection allows you to take advantage of our powerful reporting and filters. You can view leads by client, by company, or using any other combination of the fields you have created on your website forms.  Making the connection to your website is fast and simple and we have step by step guides for both WordPress and Weebly. If your website is using a different platform form or landing page software you can most likely connect it by using our Zapier Integration.

Phone System Connection

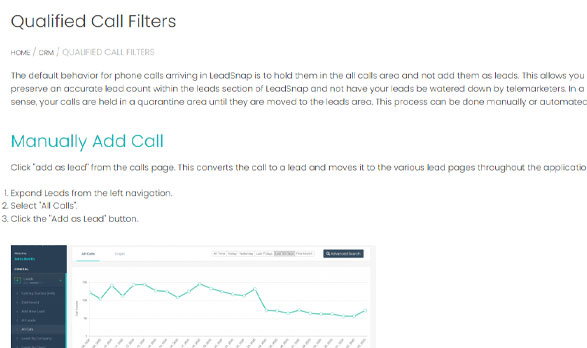
Connecting a phone system or using the built-in LeadSnap account allows you to get a full view of how your lead generation website is performing.  Your phone system companies map to your LeadSnap companies providing you with powerful reports, filtering and dashboards to analyze your data. As calls come into your phone system account they are pulled into our system. By default, these calls are not added as leads as they arrive. We didn’t want the spam phone calls to water down the lead count so the calls are held in a separate area (All Calls) within our system. If you prefer to have all these calls added as leads as they come or only some based on some rules you created you and do that by taking advantage of the qualified call filters which can be found under the company settings.

Lead Management Getting Started

  1. Lead Flow
  2. Create a Company
  3. Create a Client
  4. Connect WordPress
  5. Connect Weebly
  6. Send a Test Message
  7. Spam Filters
  8. Company Settings
  9. Account Settings
  10. Form Builder

Overview

The Reputation module is responsible for requesting, maintaining and managing client feedback once they have completed a job for your leads. In essence, it is designed to increase the number of positive reviews and decrease the number of negative reviews for each company you have listed in LeadSnap.

In order to utilise this section of LeadSnap, you must first ensure you have a Company setup and activated. If you have not already done this you can follow the create a company support guide. Whilst Lead Management does flow into the Reputation module for future leads, you do not need this setup initially as you can manually add request reviews using a leads email address.

Step by Step Guide

On the left hand navigational menu, click on “Reputation”. This will reveal all the components available in the module for you to manage your reviews. Below each component is given a brief description with a link to a more detailed support guide.

All Companies

This section is where all the companies you have created in the Add New Company settings setup section are listed for use in the  Reputation module. Before you are able to use this module, you will need to activate the company using one of your Reputation credits.

The data shown is a high-level overview of the number of connected review sites, what those sites are (e.g Google), how many reviews each company has, the last time a review was left, and the average review rating. If your company is activated, you will have a “View” button in the far right-hand column. Clicking this will take you to the Dashboard.

Dashboard

This section provides a number of widgets that relate to the remaining sections in the Reputation navigational menu and provides a snapshot of the company’s reputation status. Each widget has a “View All >” in the top right hand corner. Clicking on this will take you to the corresponding navigational menu option for that widget. So if you click on View All on the Reviews Summary widget it will take you to the “Reviews” section from the menu. There is also a “∧” in the top right hand corner. Clicking this will minimise that particular widget from view. You can maximise it again by clicking the “X” that appears.

To learn more about how to use the widgets and data overview follow the detailed “Reputation Dashboard” support guide

Funnel

The Funnel section is engine that drives the Reputation module. Here you can create the look and feel for the review requests and also configure how bad reviews are managed. You can choose between stars, faces and thumbs up/down. Good reviews can be passed directly to your public review sites, e.g. Google; Facebook or a custom site of your choosing. Bad reviews can be directed to the Feedback component. This prevents negative reviews being made public and impacting your external reputation but also allows you to direct these to the client so they can respond and address the reason for the bad review.

To learn how to configure the look and feel as well as the management of good and bad review, follow one these detailed support guides:

Reviews

This section enables you to look at all reviews that have been submitted by your leads and reply to them in the Reviews section. You can even edit a reply once it has been sent. It is good practice to acknowledge a review as makes your leads feel like you are providing a personal touch and their opinion matters, they will remember that you commented. This may influence them in recommending your company to others and also coming back for potential repeat business.

To learn more about how to manage your reviews and send review request, follow the detailed “Reputation Reviews” support guide.

Review Requests

This section allows you send review requests and manage those invitations. All you need is a name and an email address and your lead is sent an invitation, configured in the Funnel and Email sections, to provide a review on the services they received. If necessary, you can delete an invitation as well.

To learn more about how to manage and send review request, follow the detailed “Reputation Review Requests” support guide.

Feedback

This section is simply an overview of all the negative feedback received from your leads. At present there is little functionality in this section other than to delete the feedback or a link to edit the company details.

Notifications

This section is where you can configure how negative feedback is managed once received. You can set up one or more email addresses for the feedback to be automatically forwarded on to. This ensures that you client can take action to mitigate and rectify, if possible, the leads experience with a view to returning a positive review instead.

To learn more about how to automate notification management, follow the detailed “Reputation Notifications” support guide.

Email

This section is used to create, automate or manually send either single or email drip campaigns requesting reviews from your leads. You can setup scheduled emails to remind leads to complete a review if they have not responded to the initial request. You can configure the Subject Line and Body of the Email for each one sent. Additionally you can setup the email SMTP settings for each company so that the requests, and follow ups, are sent from a recognised company email and not the LeadSnap system, which is the default.

To learn more about how to create email drip campaigns and configure each company’s, follow the detailed “Reputation Email” support guide.

Additional Reference Support Guides

Add a New Company

Lead Management Overview