Support Navigation

The LeadSnap phone system is powerful and flexible. For our system to function properly it is required to have your phone numbers within our system. You have two options on how you can get phones into our system. You can port phone numbers (transfer phone numbers into our system from another carrier) or you can purchase the phone numbers directly from within LeadSnap. In this article we will take you through the process of purchasing phone numbers from within our system.

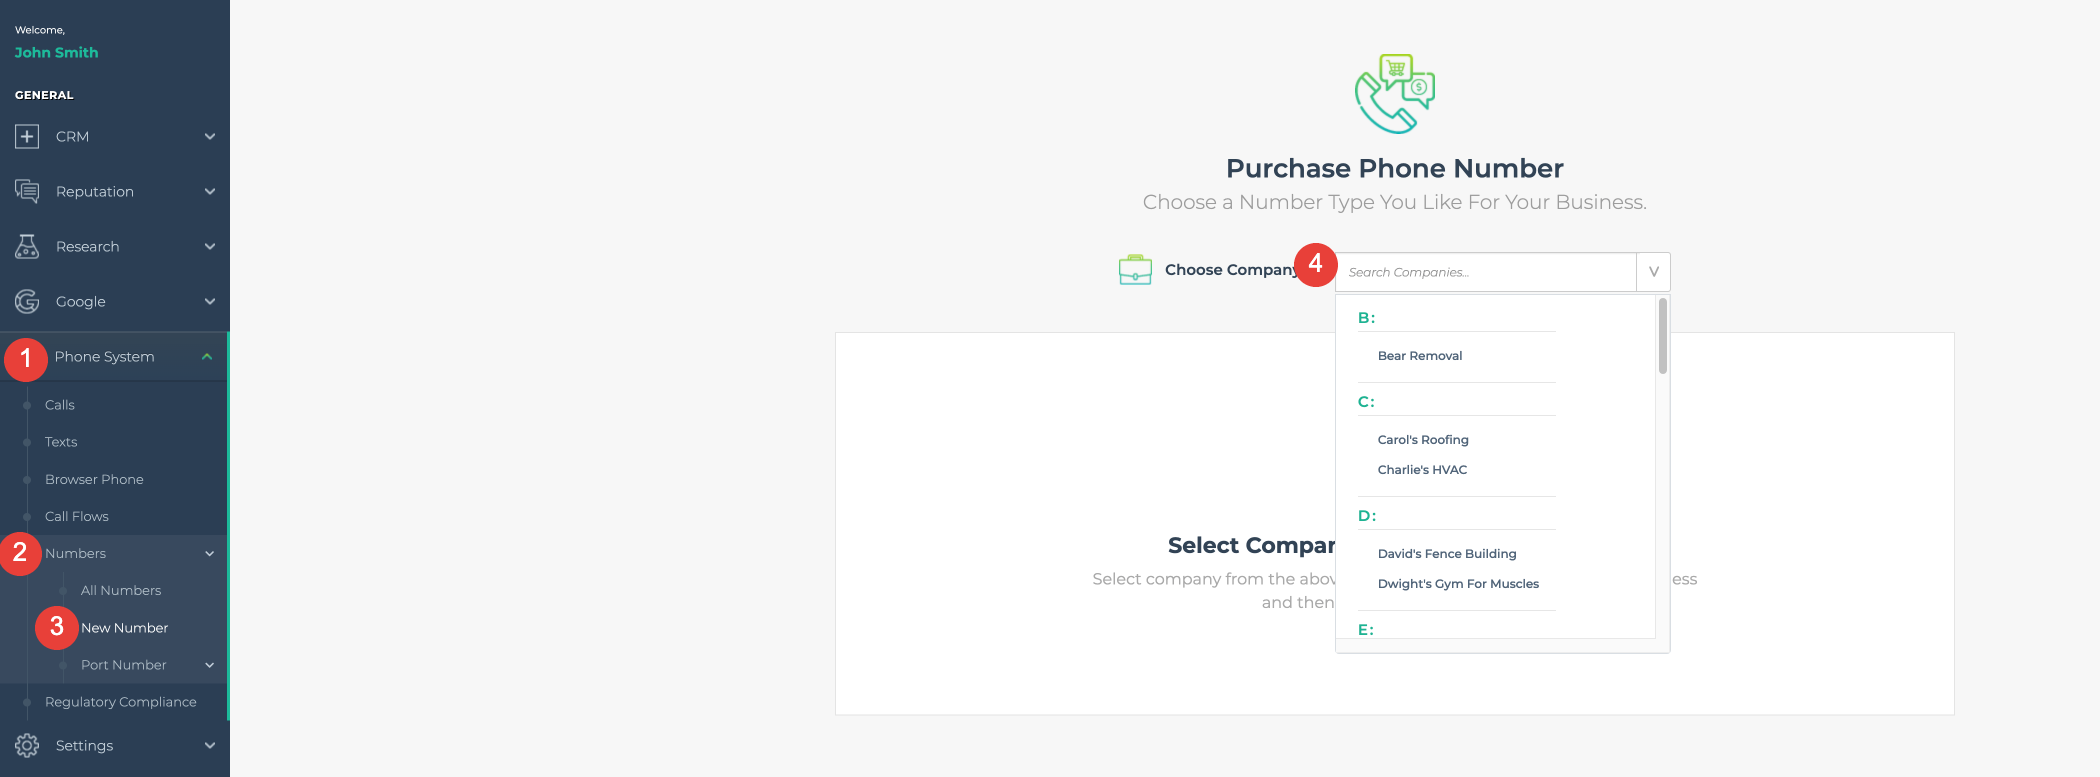
  1. Select/expand Phone System from the left navigation. 
  2. Select/expand Numbers. 
  3. Select new number.
  4. Select the company that will be associated with the new phone number.
    1. Each phone number is required to be associated with a company. We use companies to organize the phone numbers and call reports. The good news is there is no charge for companies and you can get one set up in less than 30 seconds. Check out this article for more information on how to create a company.
Purchase Phone Number

Now that we have selected the company we should see an image similar to the one below.

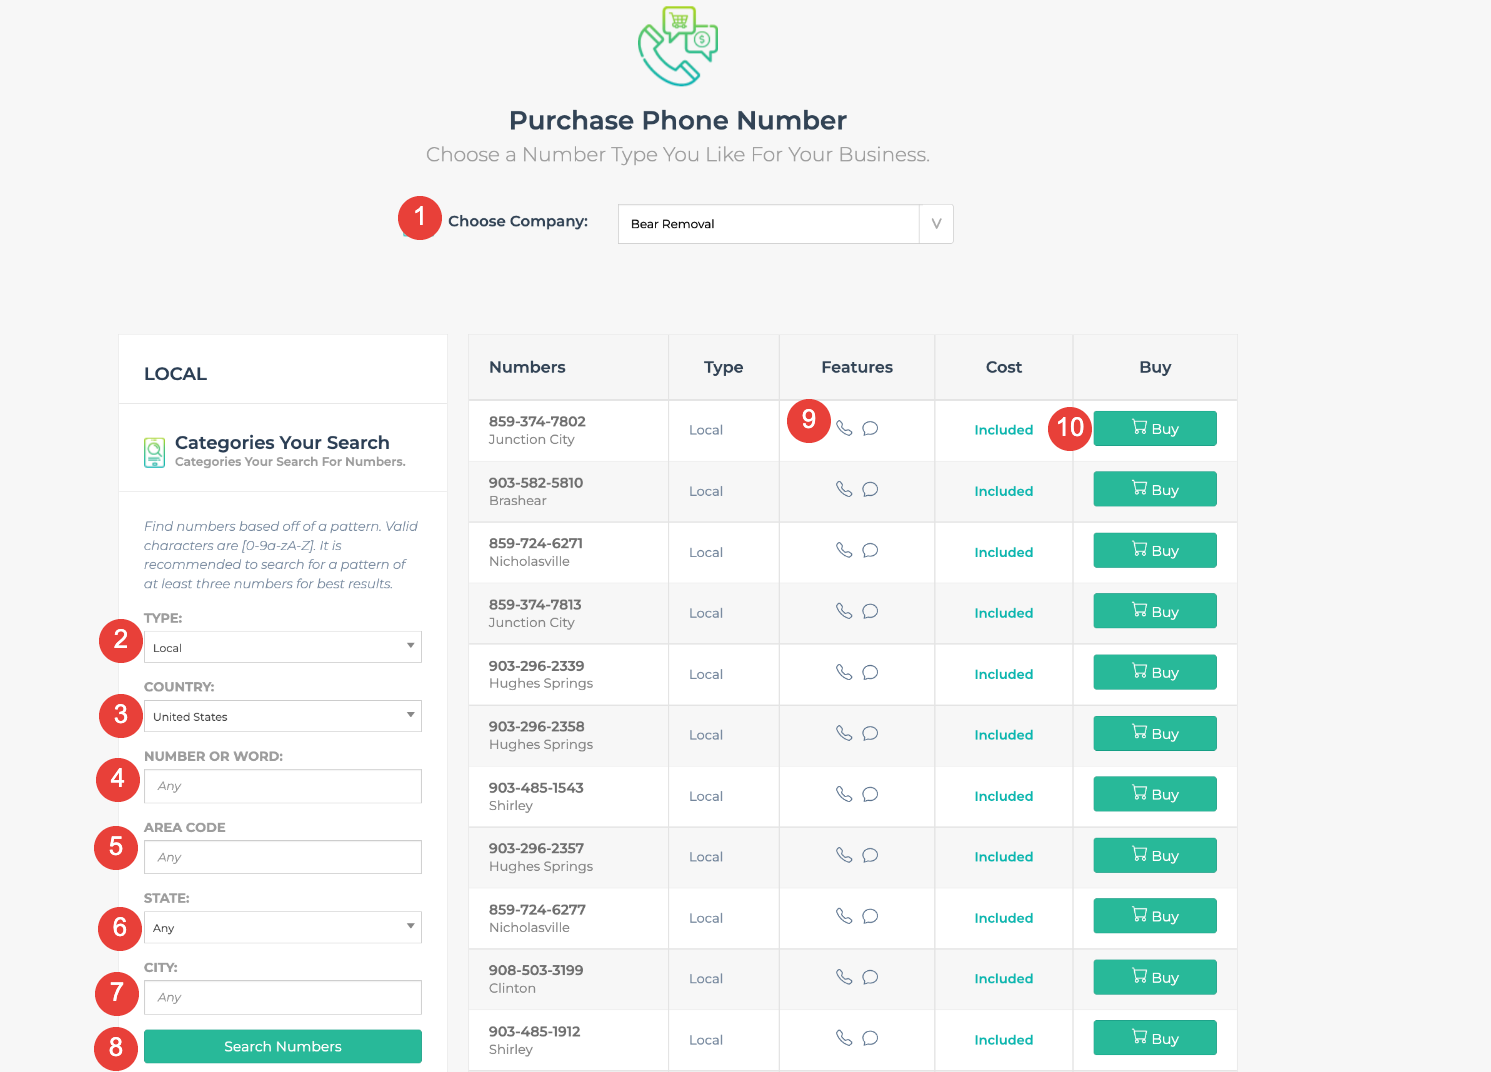
Descriptions align with the numbers from the associated picture below.

  1. Company Selection
  2. Type - Select between local or mobile phone numbers. This only applicable for certain countries. In some countries these phone numbers will have different functionality. For instance some countries local phone numbers will not have texting functionality. See the features column (number 9 in the photo below).
  3. Country - Select the country which you would like to purchase a phone number.
  4. Number or word - numbers 2 through 9 on a standard phone letters associated with a key. You can search for words that match up with associated letters from each key. Please see this image for the associated letters with each key.
  5. Area Code - Enter the area code for which you would like to search for available phone numbers.
  6. State - Search for phone numbers by state (United States only).
  7. City - Search for phone numbers by city. This will automatically pull the appropriate phone numbers that are associated with a city.
  8. Search Numbers Button - Click this button to search for phone numbers using your applied search filters.
  9. Features - This column will show you the features that are available for the selected phone number.
    1. Phone Icon - Phone calls are available for this number.
    2. Chat Icon - Texting is available for this number.
  10. Buy Button - Click this button to purchase the selected phone number.

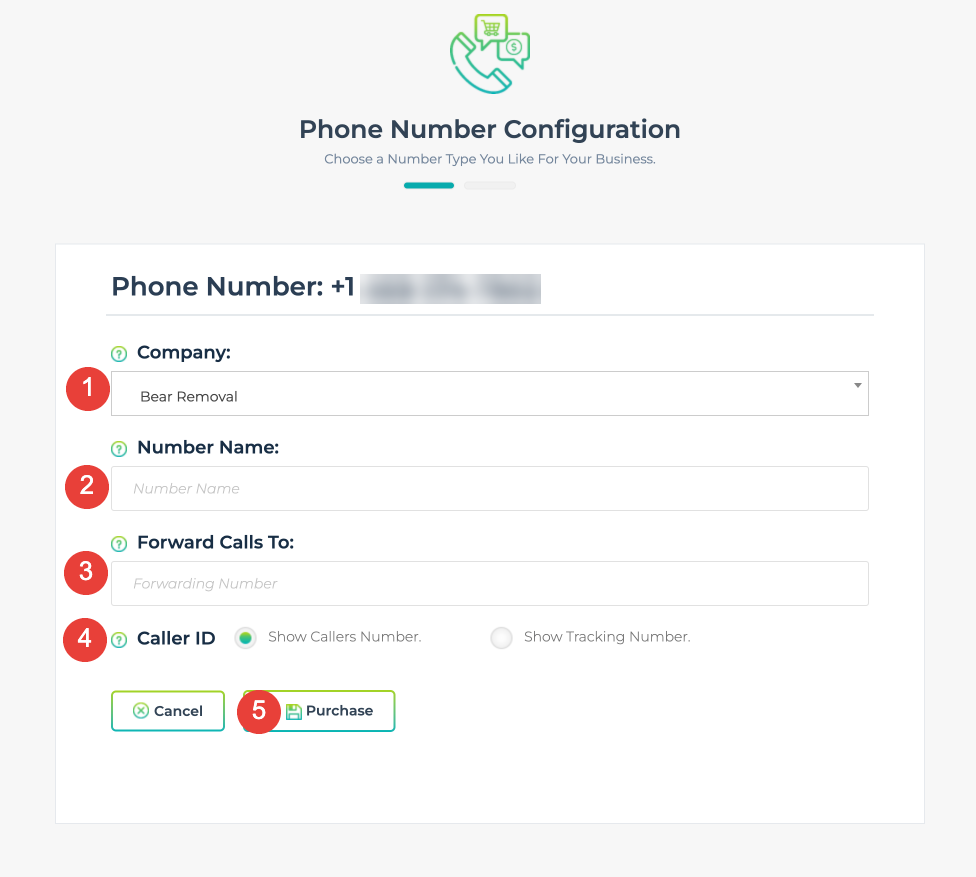
After clicking the buy button your will arrive at the the number configuration screen. The phone number purchase is not final until you complete the items on this screen. For some countries additional information is required, such as an address. These requirements are determined by the compliance regulations of your country.

  1. Company Selection - select the company within LeadSnap that you would like your phone number to be associated with.
  2. Number Name - this is a nickname that can be useful to identify the phone number on reporting screens. Some companies might have more than one phone number, this can help you distinguish between other phone numbers within the same company.
  3. Forward Calls To - All phone numbers are required to have a forwarding number. Our phone numbers are not hardwired to a phone like a land line or your cell phone. We need to know when there is a call. For this reason we require a phone number to forward the calls to as they arrive.
  4. Caller Id - Caller ID is the number that is displayed on your phone when a call is forwarded. You have two options for the number to display.  You can show the number of the caller or you can show the tracking phone number which is the actual phone number that you have purchased.
  5. Purchase Button - Click here to finalize the purchase of your phone number.
Number configuration

On This Page