Qualified Call Filters

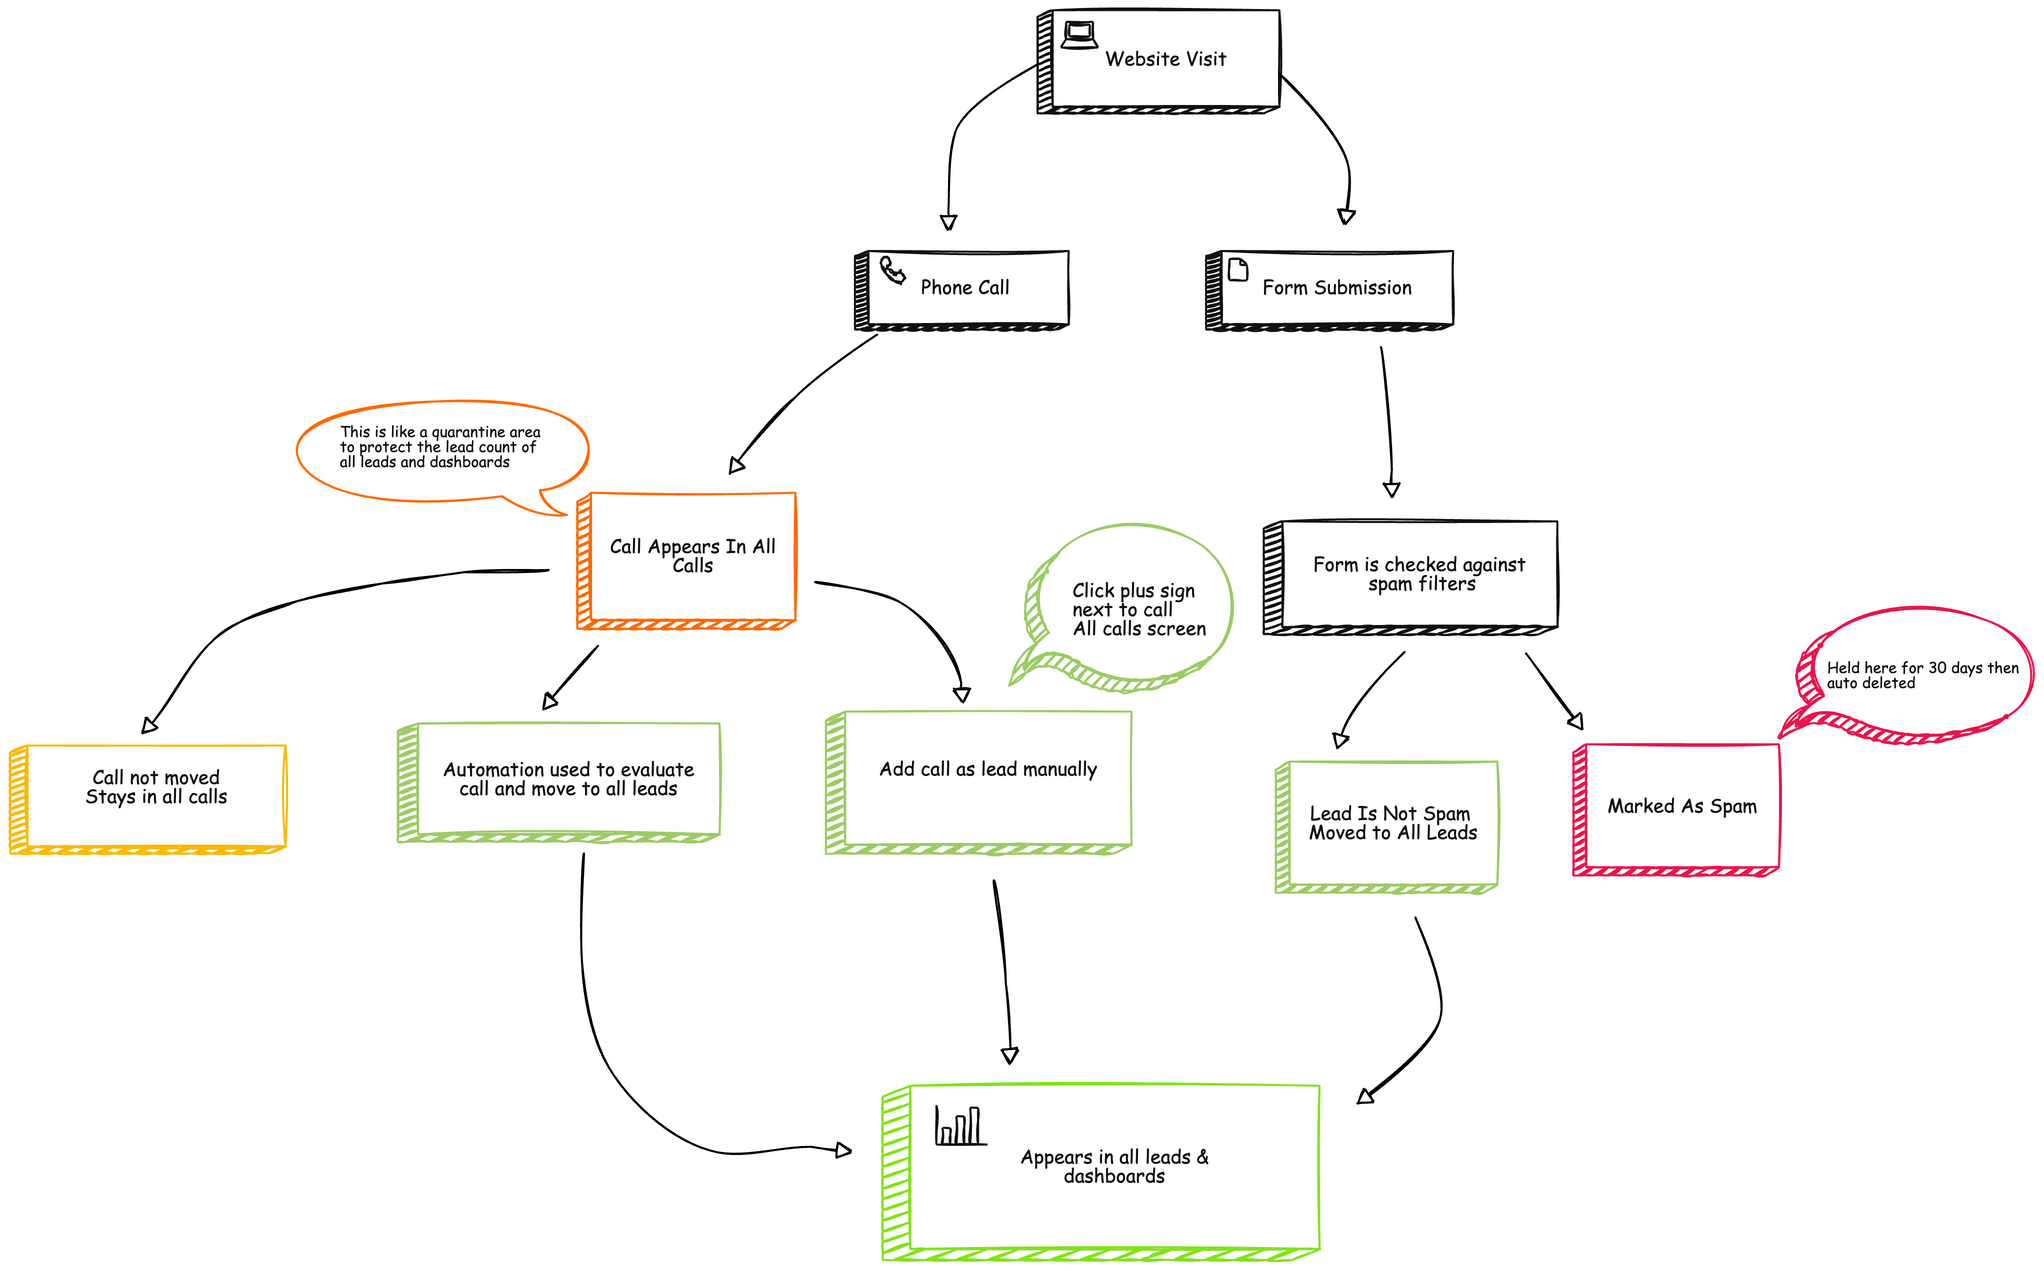
The default behavior for phone calls arriving in LeadSnap is to hold them in the all calls area and not add them as leads. This allows you to preserve an accurate lead count within the leads section of LeadSnap and not have your leads be watered down by telemarketers. In a sense, your calls are held in a quarantine area until they are moved to the leads area. This process can be done manually or automated.

Manually Add Call

Click “add as lead” from the calls page. This converts the call to a lead and moves it to the various lead pages throughout the application.

  1. Expand Leads from the left navigation.
  2. Select “All Calls”.
  3. Click the “Add as Lead” button.

Qualified Call Filters

The qualified call filters automate the process of moving calls to leads based on the rules that you set. This is done on a company level from the edit company screen.

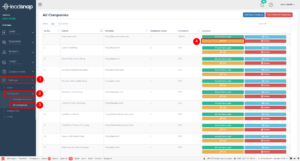
  1. Expand settings from the left navigation.
  2. From within the settings menu expand companies and then select all companies.
  3. Click edit next to the company for which you would like to adjust the qualified call filters.
  4. Navigate to the Qualified Call Filters area.
  5. Select and adjust your filters.
  6. Click update to save your updated call filters.

For calls to be added as a lead they must meet all the selected qualified call filters. To add all calls as leads enable the call filters without any of the call filter selections.

  • Qualified Call Filters Enable – This enables or disables the qualified call filters.
  • First Time Callers – When this is enabled calls from first-time callers only will be added as a lead.
  • Call Duration – Only calls with a duration greater than the specified time will be added as leads.
  • Answer Status – Only calls that have a status matching the selected calls will be added.
  • Phone Number Area Code – Only calls that match one of the selected phone number area codes will be added as leads.

Deactivate Company

LeadSnap works on a credit basis for the lead management, reputation management, and GMB management modules. As you activate a credit in one of these modules the credit is deducted from the credit balance in your subscription. If at some point you would like reclaim the credit and release the connection between the module and the selected company you can do this through the company info tab of the company dashboard.


Step By Step Guide

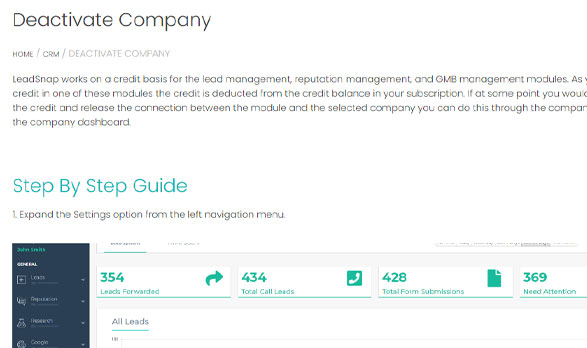
1. Expand the Settings option from the left navigation menu.

2. Expand the companies sub-menu from within the settings menu item.

3. Select “All Companies”.

4. Click the view button next to company you wish to adjust.

5. Select the “Company Info” tab.

6. Chose Deactivate next to the selected module.

7. Confirm by entering your account password. This process is irreversible.

Add New Website Form

This support guide explains the functionality and how to use the Website Forms section of the Leads Management module.

Step by Step Guide

To access this section, click on the Leads header in the left hand navigational menu. This will then expand the module and display all the sections available to you. Click on “Website Forms” and this will expand to display the options available to you.

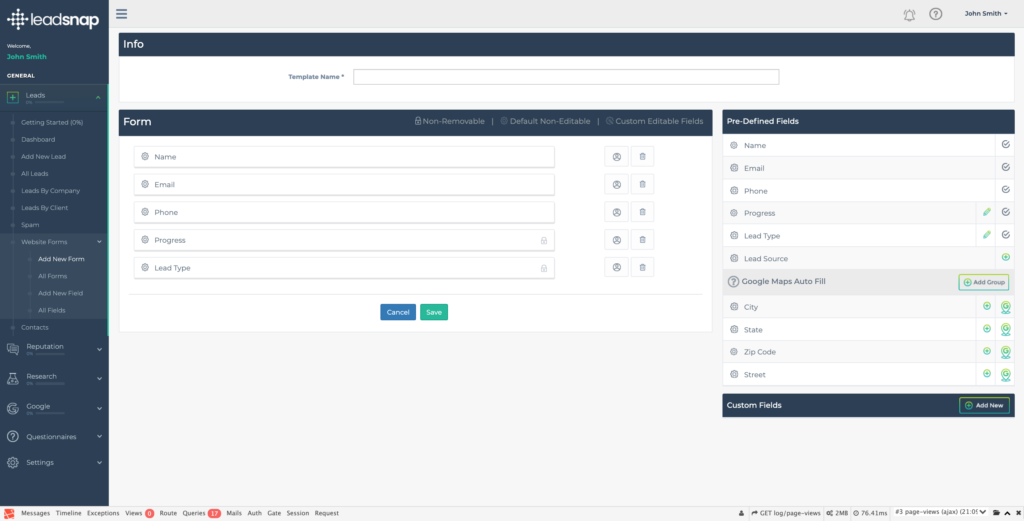
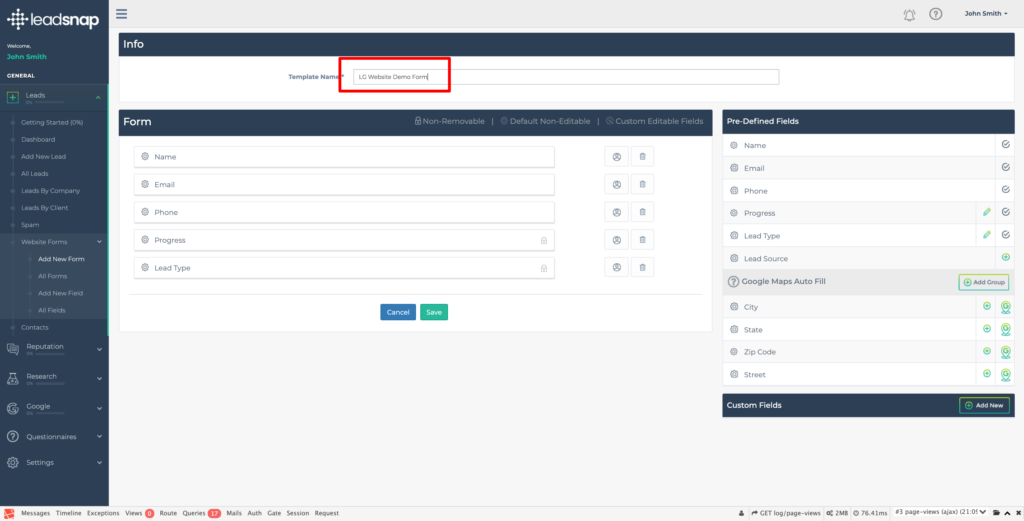
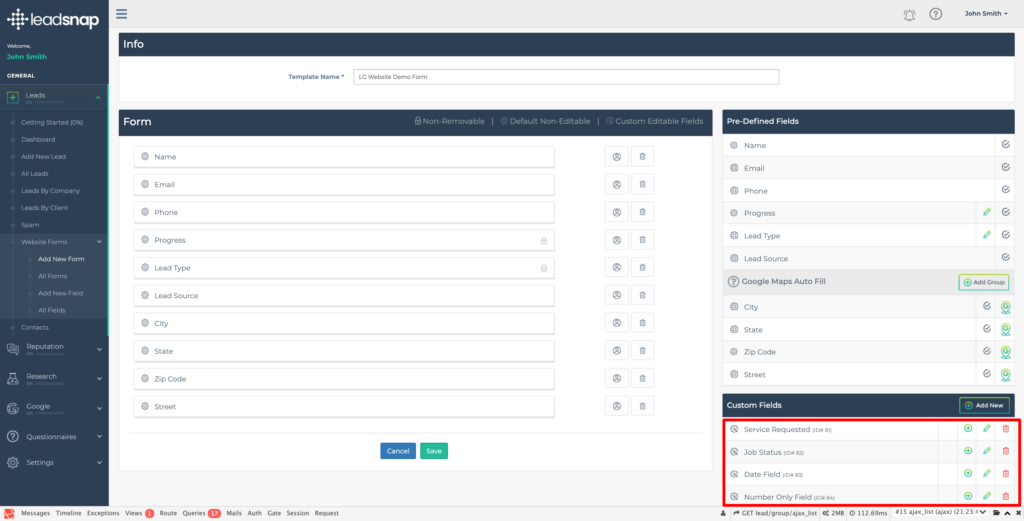
Click on “Add New Form” and you will be presented with the screen below.

Template Name

The first thing you will need to do is to name the template so it can be assigned to Companies to use on their sites.

This is done in the “Info” area at the top of the screen. The Template Name field is the only field situated in the middle of the screen. Enter the name you wish to identify this form. The name would usually reference the company you are going to associate it with, to make it easier to search for and find in the dropdown list.

Form

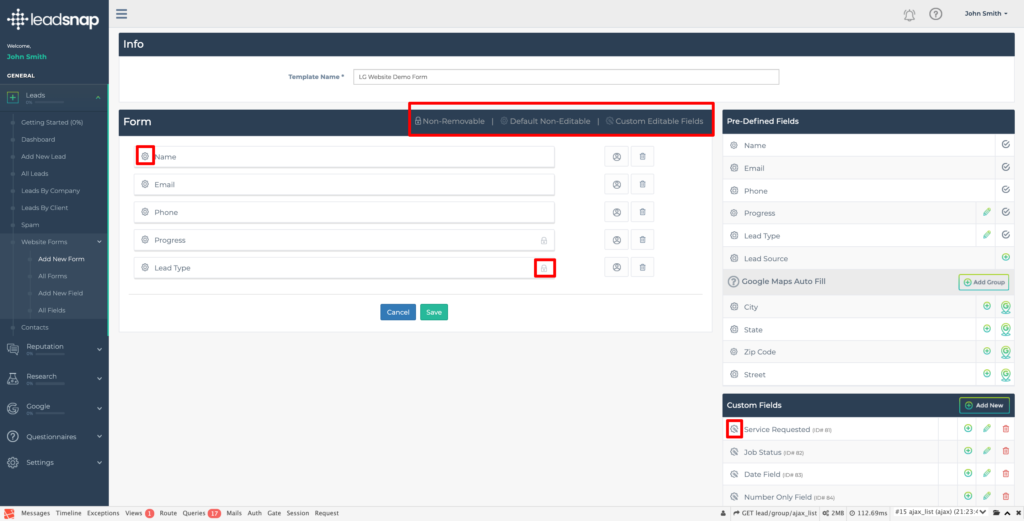
This area displays all the fields that this form will capture for the company it is assigned to. There are three types of fields and they each have an icon so you can easily recognise them.

  • Non-Removable – These are always on the form by default and cannot be removed
  • Default Non-Editable – These are standard Pre-Defined fields who’s usage and names cannot be altered
  • Custom Editable Fields – These are fields created by you and can be edited and renamed according to yours or the companies changing requirements

The legend is also on the title bar of the area for reference.

Edit Field Settings

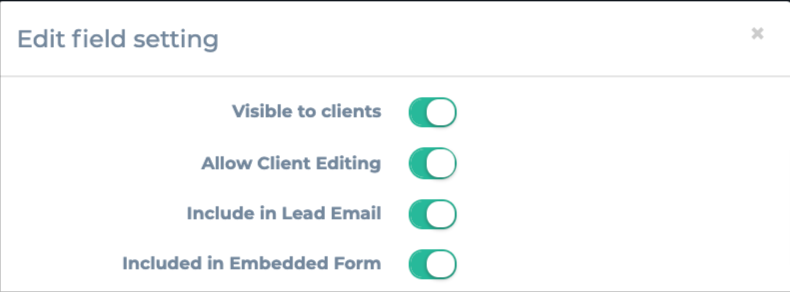
Each field has four settings that are configurable, regardless of their type. These are used to determine if the fields are visible to the clients, editable by the clients, included in the lead email that is forwarded and if it is included in the embedded form that appears on the site.

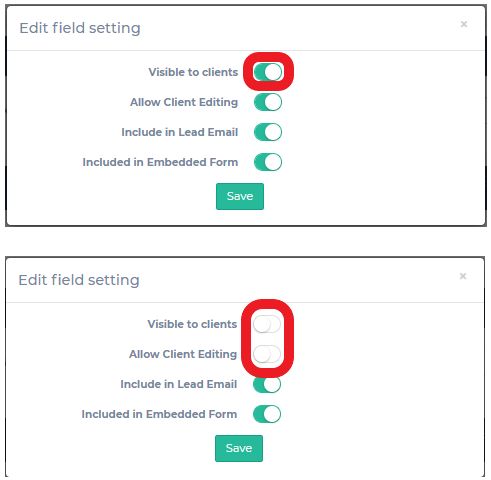
All except one work independently of each other and can be toggled on/off by clicking on the circular button. When the button has a green area showing to the left of the button, the setting is Enabled. When the button has a white area showing to the right of the button, the setting is Disabled.

The “Visible to Clients” setting is the only one that can affect another automatically. If you disable this, and the “Allow Client Editing” is enabled, the it will automatically disable the “Allow Client Editing” as well. This is because it is a logical step to do so. However, it will not enable the client editing when doing the reverse as this is not necessarily a logical step.

Adding Pre-Defined Fields

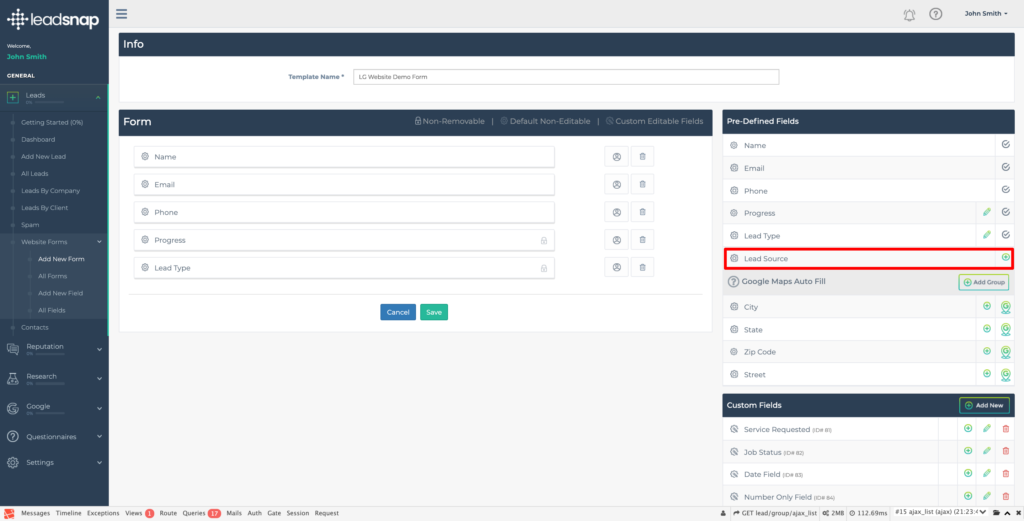
Pre-defined fields, or system generated fields, are standard for all forms, for example Name or Phone. To ensure the stability and consistency of the system they are also non-editable. They cover your basic information as well as data from Google Maps, which are automatically filled.

You will see a list of the Pre-defined fields on the right hand side of the screen.

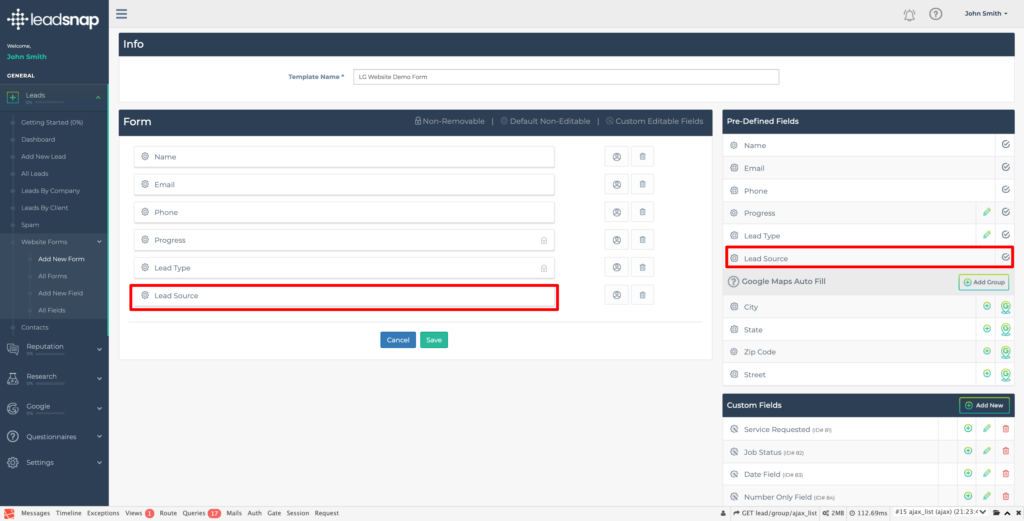
To add a pre-defined field you need to click the green circled + sign. This will add it to the bottom of the current list of fields in the Form area. The + will be altered to a grey circled

When a pre-defined field is added, you will see it listed under the Form area and in the Pre-Defined Fields listing you will see a circled tick. This indicates it is now listed on the Form.

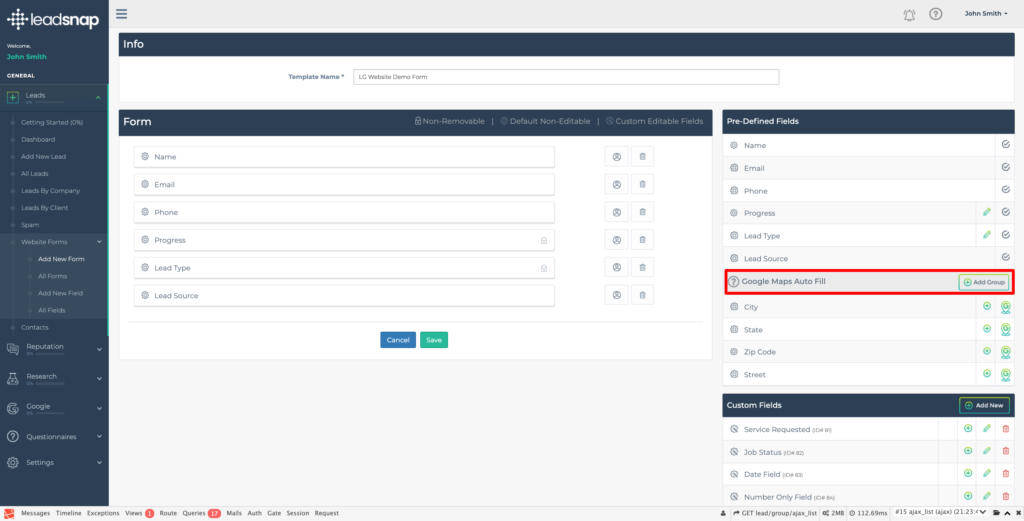
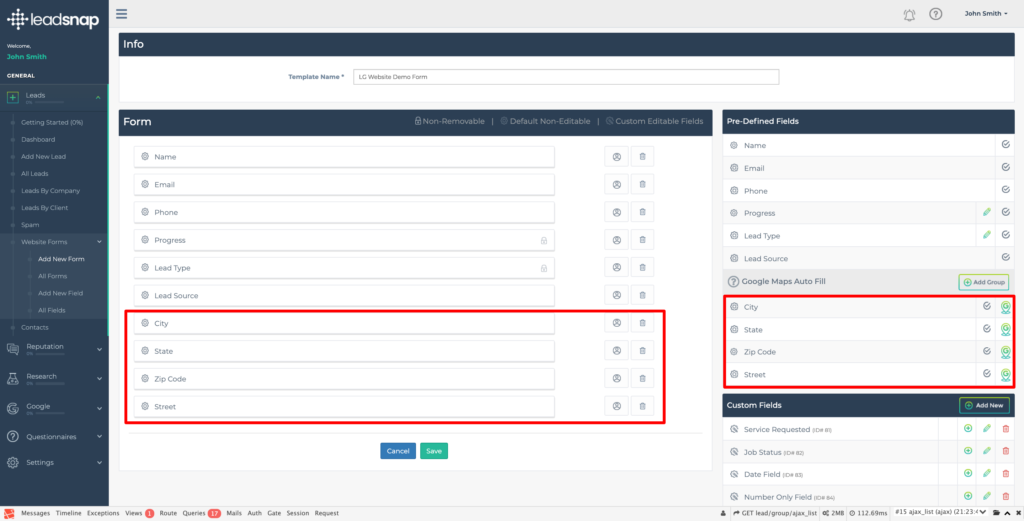
Adding Google Maps Group

The group of Google Maps Auto Fill fields have the ability to be added all by the click of a single button. On the group title bar there is an “Add Group” button on the far right.

Adding Custom Fields

Custom Fields allows you the opportunity to create and add niche specific fields to capture data in. The list of these can be found underneath the Pre-Defined Fields on the right hand side of the screen.

When you create your first form, your list of Custom Fields will be blank. Once you’ve added new custom fields, they will be available for you to use across all future forms.

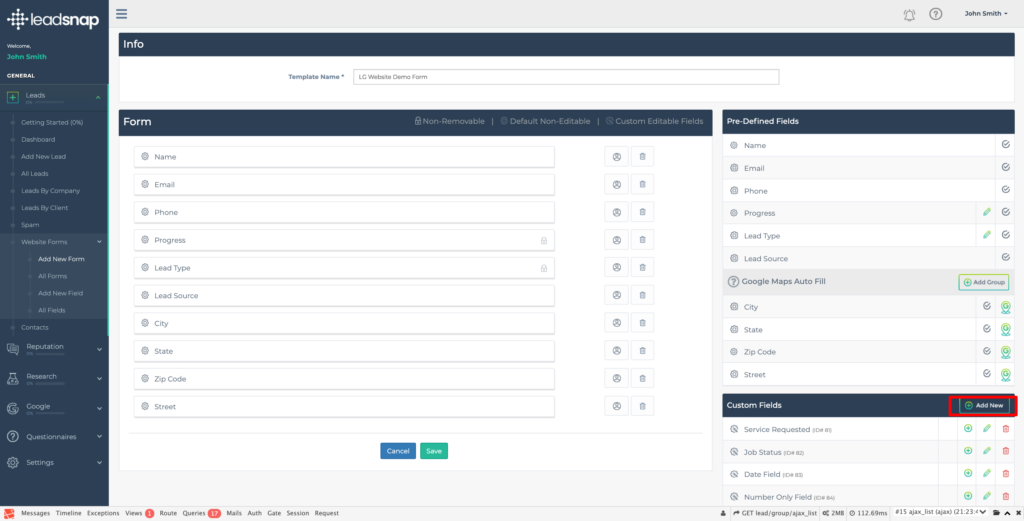
To create a new custom field, you will first need to click on the “Add New” button. This is located at the far right of the Custom Fields header bar.

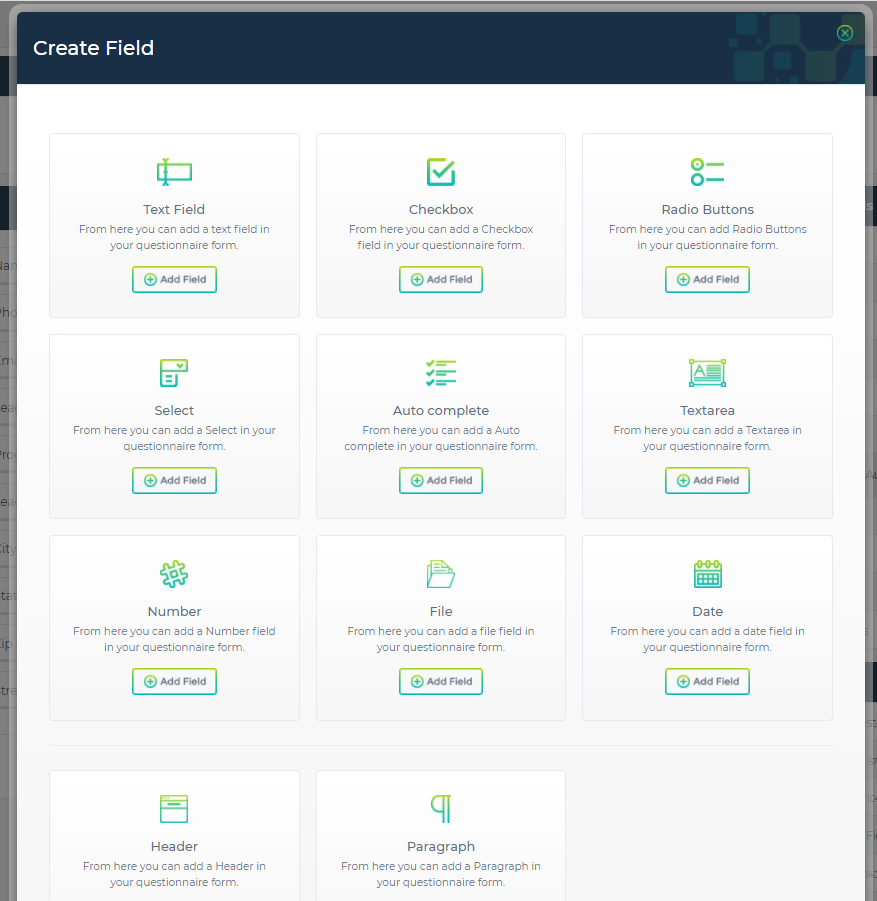
The Create Field pop-up window will display the options you have to choose from.

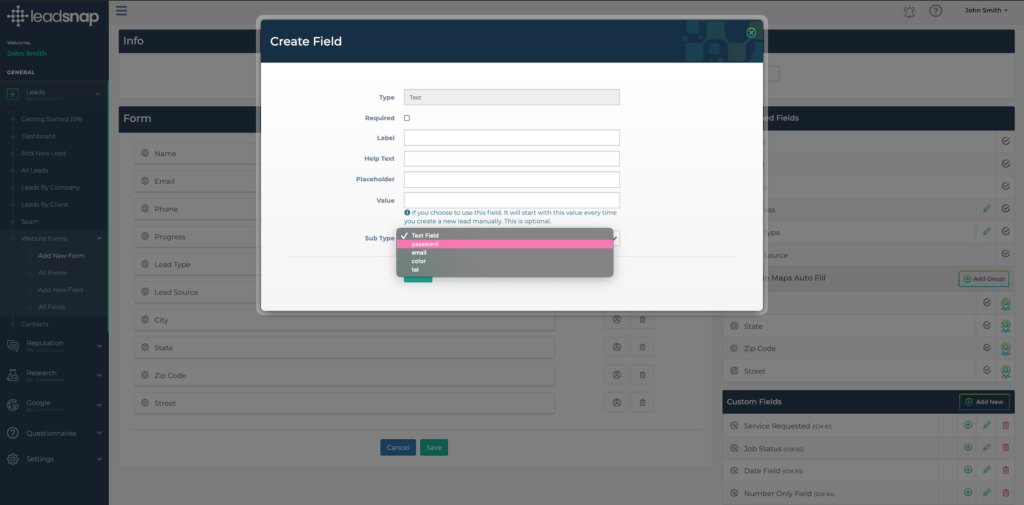
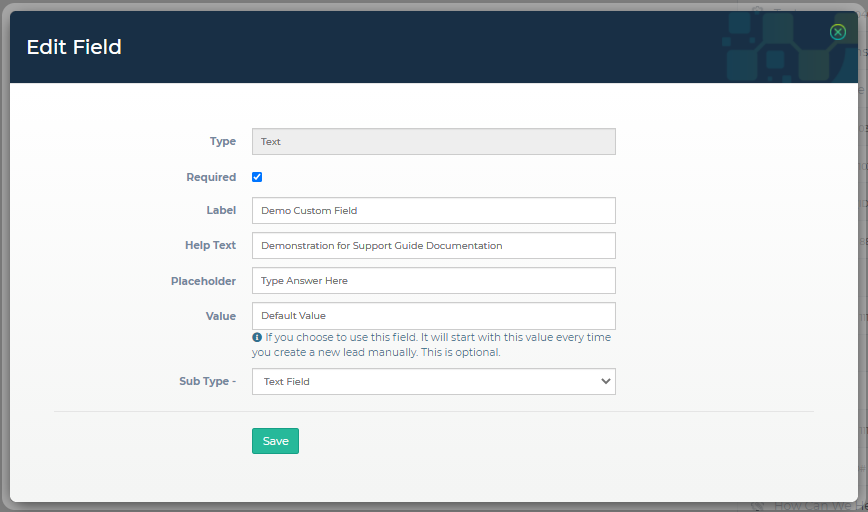
Choosing a new Text Field as an example, you are then presented with the configurable attributes related to that field type. For a text field you have the following:

  • Required – Checkbox to enable/disable if this field should be mandatory
  • Label – The title or name given to the field e.g. “Phone”
  • Help Text – Information to the customer to help them add the correct information that sits underneath the field
  • Placeholder – This is the instruction text that will sit in the field but disappear as soon as the customer begins typing
  • Value – Optional default value
  • Sub Type – What type of Text field is it. Standard Text, Email, Password etc

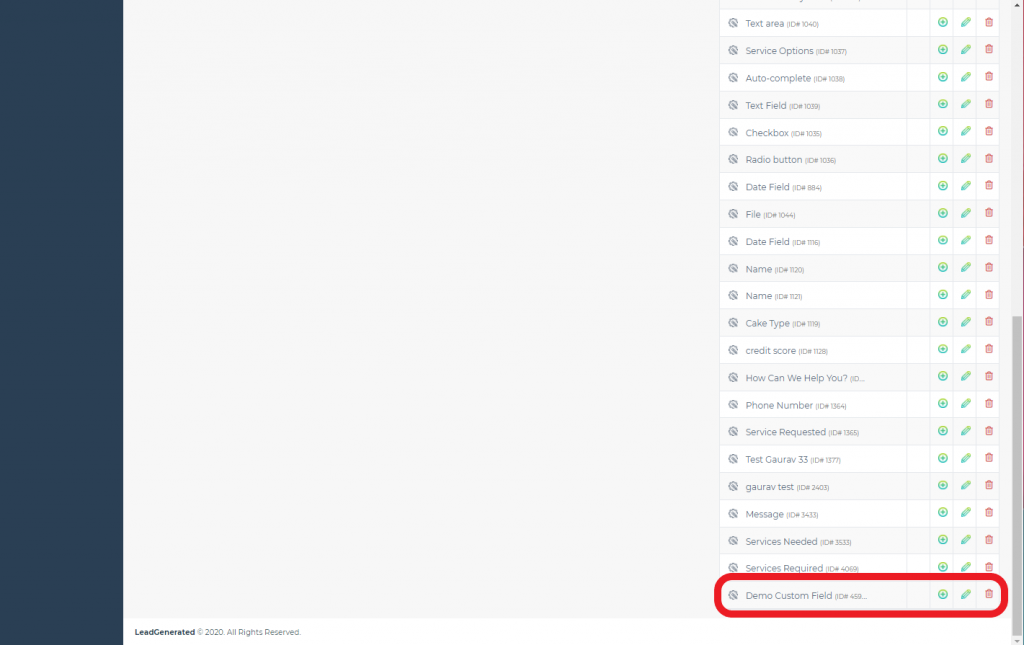
Once you have set all of the attributes, click on Save and the new Custom Field will be added to your list on the right hand side of the screen. If you already have some then the new one will be added to the bottom of the existing list.

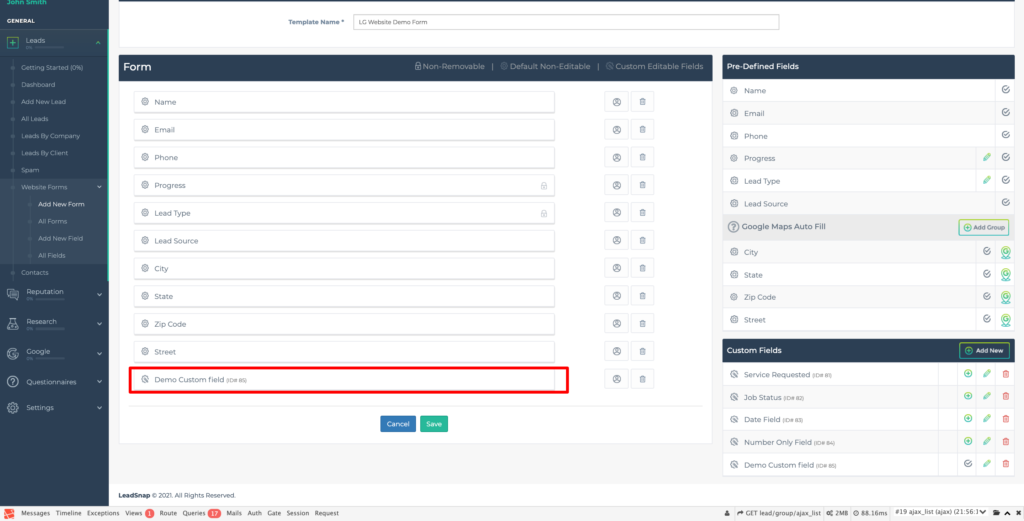
To add the new custom field you simply click on the green circled + as per the Pre-Defined Fields. It will be added to the bottom of the Form list and then have a grey circled tick next to it in the list.

With the form now completed as required, click the Save button. This will save the form and redirect you to the All Forms list under Website Forms menu module.

Assigning Company (Website Form)

This support guide explains the how to assign a Company to the Website Forms of the Leads Management module.

Step by Step Guide

If you have not done so already, you will need to first Add New Form by following the relevant support guide. You will also need to have a Company setup to assign the website form to. If you have not already done so, you will to follow the Add A New Company support guide.

Overview

You need to assign a website form to a company to be able to generate the script that will be used to embed the form onto your website.

Edit Company

First you need to get to the edit company screen. To do this you need to select Settings on the left hand navigational menu. This will then expand to provide further options.

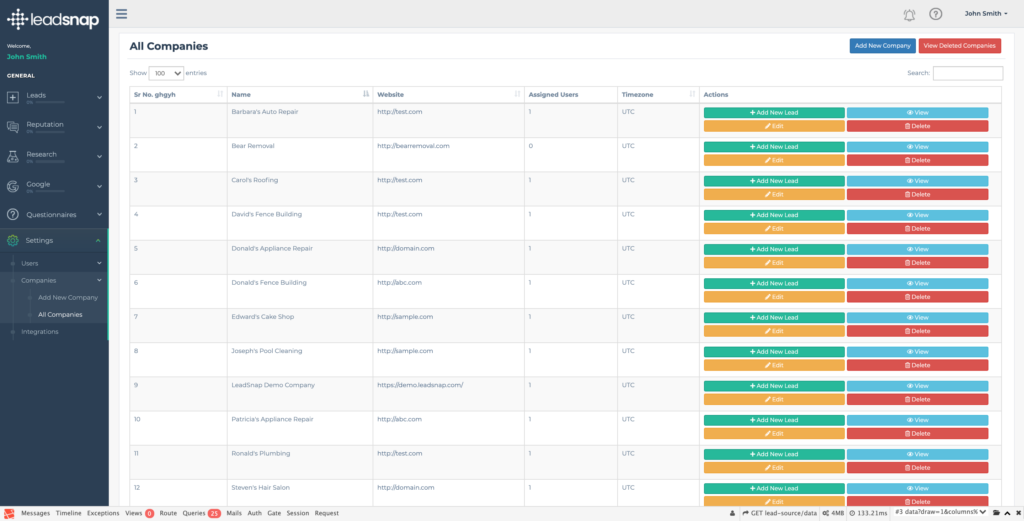
From these options, click on Companies. This will further expand to provide company specific options. Click on All Companies and you will be presented with a screen like the one below.

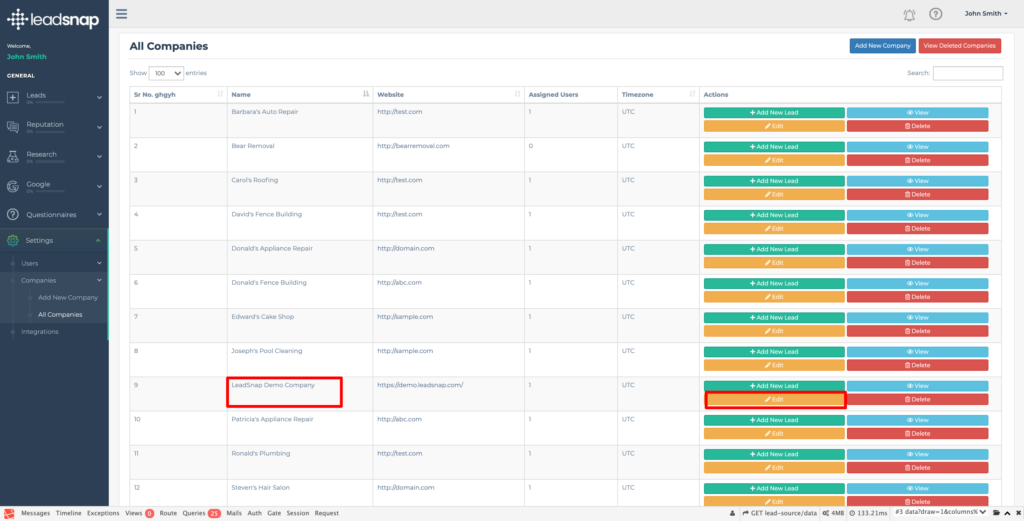
Scroll down and find the company you wish to assign the website form to. You will need to click on the Edit button at the far right hand side of company’s row.

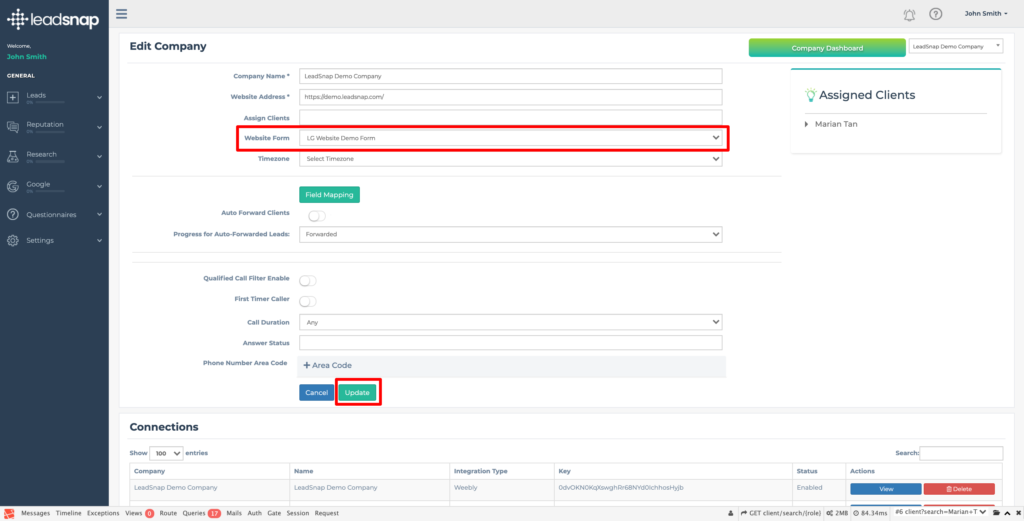
You will now need to click the dropdown arrow on the Website Form field. This will present you with the list of forms you have created.

Select the form you wish to assign to the company. To save this you will have to click the Update button towards the bottom of the screen.

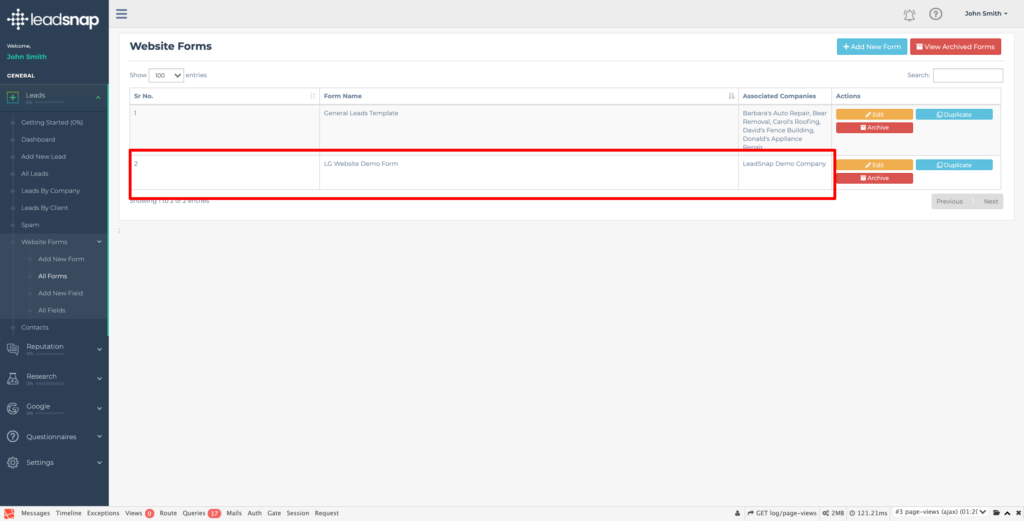
Returning to the All Forms listing, via Settings on the left hand navigational menu, you will now see the form has the company associated.

Add Email Account

LeadSnap sends emails for a variety events throughout our system. By default the emails come from [email protected]. We understand that this probably not desirable in many cases so we have provided you the ability to add your own email accounts to our system. Some of the common cases where you may want to send emails from your email instead of the LeadSnap default email are:

  • Delivering leads to you or your clients
  • Review requests
  • Questionnaire emails

Adding an Email Account

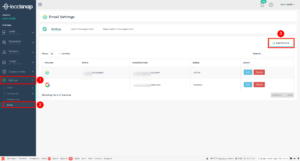
To add an email account expand settings from the left side navigation.

Select Email

From the top right corner click the “Add Email Account” button.

Select your email provider from the drop down list. If you do not see your email provider on the drop down list, select “Other”. When using the “Other” option you may need to contact your host to get the SMTP settings associated with your email account. Check out our SMTP settings article for the SMTP settings for some of the most popular website hosts. When using Gmail there are some additional steps required. This guide will walk you through the settings necessary for Gmail.

After completing the email settings click the “Validate” button to ensure we are able to access the email account with your settings.

Assuming your connection is successful you should see a message like this:

After a successful validation message it is a good idea to send a test email by clicking the “Send Test” button.

In the popup menu enter an email address where you can receive our test email message. If you did not receive the email test, please check your spam email. The test email should be from the email address you just added to our system.

After receiving the test email message you can now save the email address to our system.

Once the email address is saved to our system you can start send emails from our system for Lead Emails, Review requests and Questionnaires.

For Gmail and Gsuite there are some special settings to make in order to get things to work correctly. You can find out more about these settings within this article.

Gmail/Gsuite Email Settings


Check out these articles for more information about sending emails for the associated modules.

Email Settings for Leads

Email Settings Reputation Management Module

Email Settings Questionnaire Module

Lead Management Email Settings

Among the many important functions of the lead management module is delivery leads from any incoming source to its assigned user. One of the ways this delivery can happen is by email.  In this article we are going to discuss how to adjust the email address used in the delivery of these lead emails. We are assuming that you have are familiar with how to add an email account to LeadSnap. If that is not the case please see the support article.

After successfully adding an email account to LeadSnap you can assign the email account to be used for lead delivery on a company level. This assignment can happen from two different locations. The lead management tab of the email settings page as well as the email settings tab of the edit company page.

Method 1: Email Settings

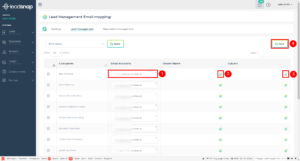
Using the email settings page you can map more than one company at a time to an email account. To map an email account to a company using the email settings page follow these steps:

  1. Add an email account to LeadSnap.
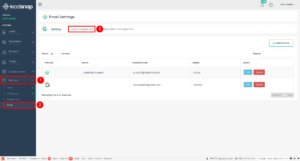
  2. Expand settings from the left navigation.
  3. Select Email.
  4. Select the Lead Management tab from the top horizontal navigation.
  5. Find the company or by scrolling through the list of companies or using the search bar in the top right corner.
  6. Select the new email address from the drop down list associated with the company.
  7. Add the sender name by clicking the pencil icon and typing in the name to be used for future lead emails for this company.
  8. Type the subject of the email to be used for future lead emails for the company.
  9. Click the save button in the top right corner.

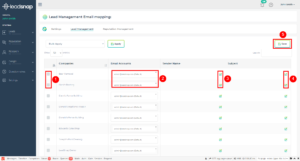
Using the Bulk Apply

The bulk apply allows assigning an email address to more than one company at a time.

  1. Select the checkboxes next to more than one company.
  2. Select the email account you wish to assign to the selected companies from the bulk apply dropdown box.
  3. Click save to apply your changes to the selected companies.

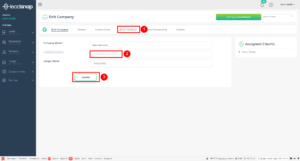
Method 2: Edit Company

The second method for assigning an email account to a company can be done from the edit company screen.

  1. Add an email account to LeadSnap.
  2. Expand settings from the left navigation menu.
  3. Expand the companies sub-menu item.
  4. Select all companies.
  5. Select edit next to the company for which you would like to update the email account.
  6. Select the email settings tab.
  7. Choose the email account from the dropdown list next to lead management.
  8. Click the update button.

Automations

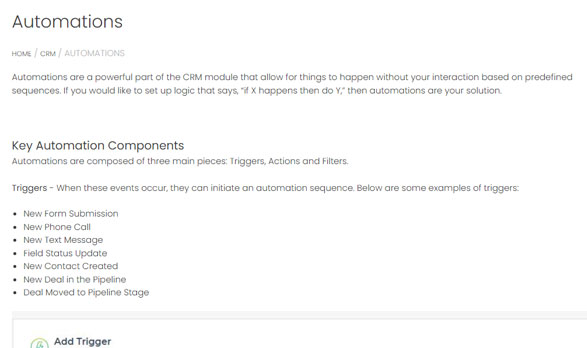
Automations are a powerful part of the CRM module that allow for things to happen without your interaction based on predefined sequences. If you would like to set up logic that says, “if X happens then do Y,” then automations are your solution.


Key Automation Components

Automations are composed of three main pieces: Triggers, Actions and Filters.

Triggers – When these events occur, they can initiate an automation sequence. Below are some examples of triggers:

  • New Form Submission
  • New Phone Call
  • New Text Message
  • Field Status Update
  • New Contact Created
  • New Deal in the Pipeline
  • Deal Moved to Pipeline Stage

Actions – Actions can be strung together into a list of automated processes that can be performed. You can add as many actions as you would like in an automation. Below is an example of a list of actions that can be used to perform automated tasks within the system.

  • Condition
  • Send Email
  • Send SMS Text
  • Create Contact
  • Wait (the sequence will wait for a specified amount of time before continuing)
  • Update Field Status
  • End If (will end if something becomes true)
  • End If Review Submitted will end if a review is submitted)
  • Send Questionnaire


Filters – These are used with triggers, allowing you to limit a trigger being fired. For example, let’s say you have a trigger that you would like to be fired when a new form submission is submitted, but only if it is for a certain company or from a certain value in the zip code field.Filters make this possible. Depending on the trigger, you will have different options for the filters. You can combine as many filters as you like. When using more than one filter, it is necessary for all the filters to be true for the automation to continue.

There are different field types within LeadSnap. . The default zip code field is a “text field,” meaning that you have the ability to type in the filter value. If the field type is a text field, you can use a comma separated list to include multiple values. In these cases, the automation will continue if only one of these values matches an item on your list. If the field type is a dropdown menu, then you will have a selection box for the field value.

Variables

Variables allow you to reference dynamic information during your automation. Let’s make an example to be sure this is clear. Perhaps you have a client named Bob and he owns a company called Bob’s roofing. When you create the client user for Bob and assign to the company Bob’s roofing, this information can be available when an automation runs through the use of variables.

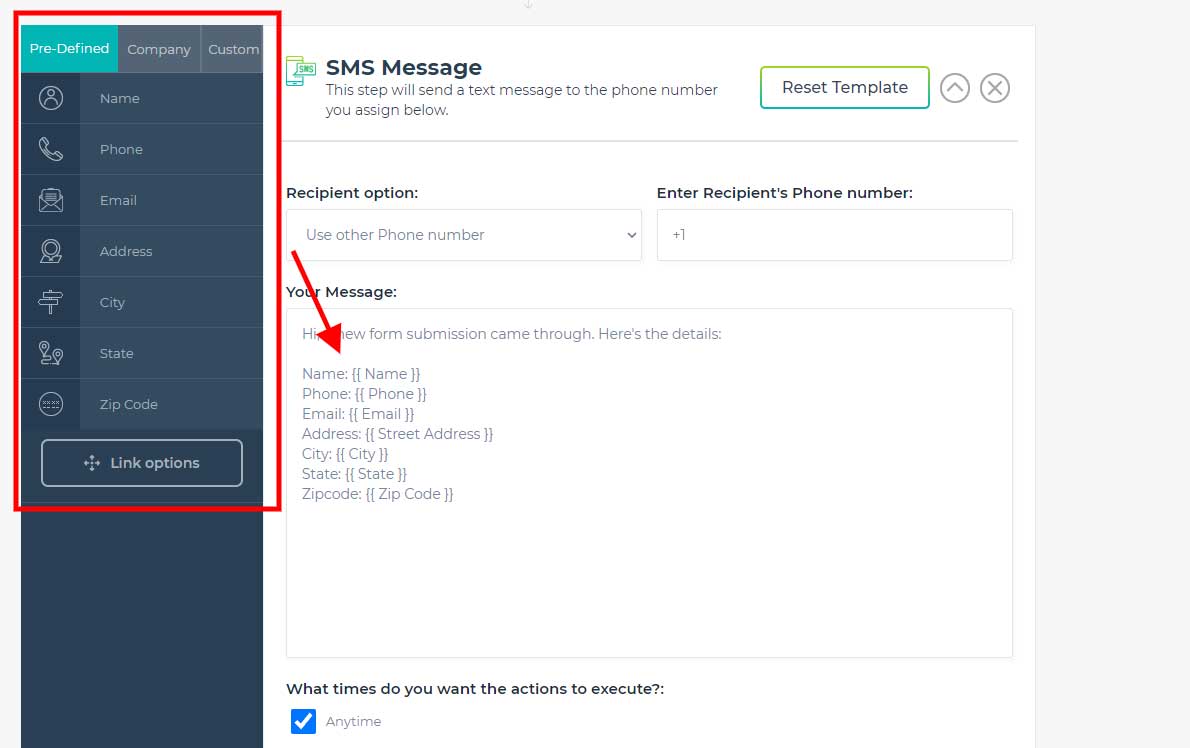
Add Variable to Message

To add a variable to a message, you can drag and drop the variable into the message box. Wherever your cursor is in the message box field at the time you drop the variable inside, that’s where the variable will be located.

Variable Types

These variables are available when sending a text message or an email. Notice in the image below the three columns for Pre-defined, Company and Custom.

Pre-Defined – These variables come with LeadSnap right out of the box and are composed of common form or lead intake information we feel will be present for most lead opportunities.

Company – This information comes from the company information that you create. When you create the association of a client with a company we can use some of this information.
Button/Link Options

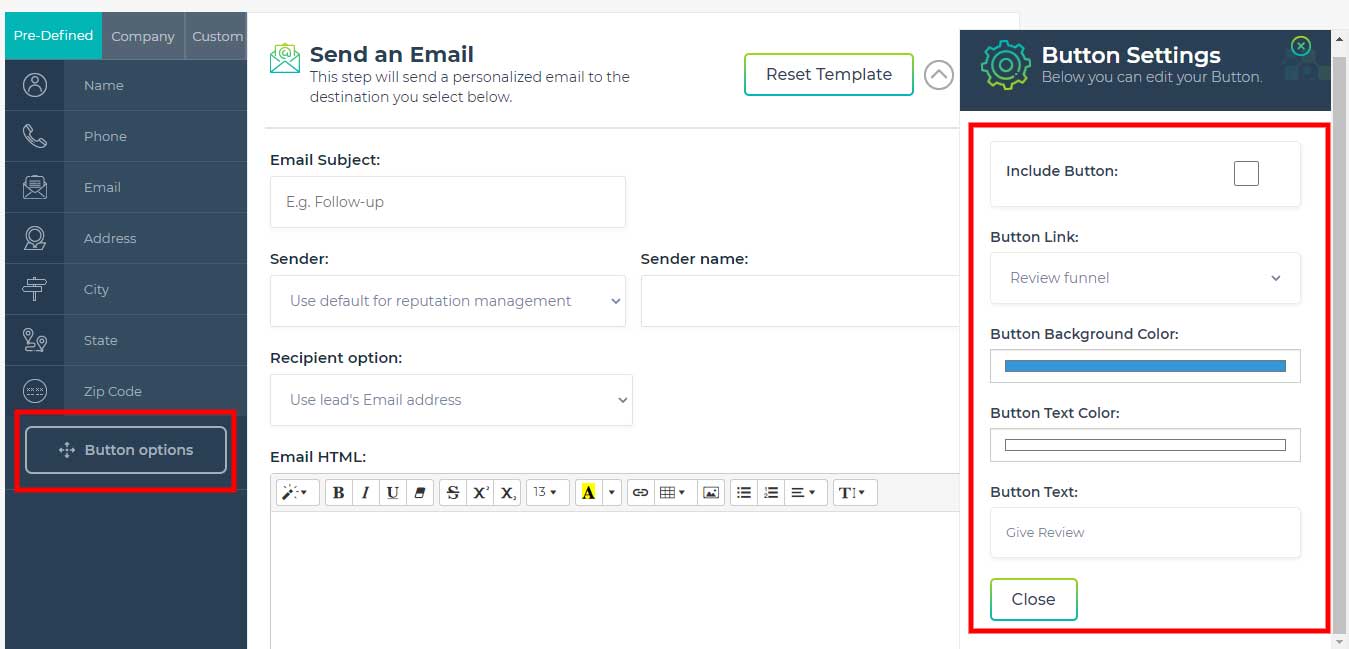
For emails and text messages, you have the ability to send a link with your message. For emails, these links can be included by using a button. Since text messages can’t contain buttons, you are limited to a normal website URL link. If your message is an email, then you will see the “button options” shown in the image below.

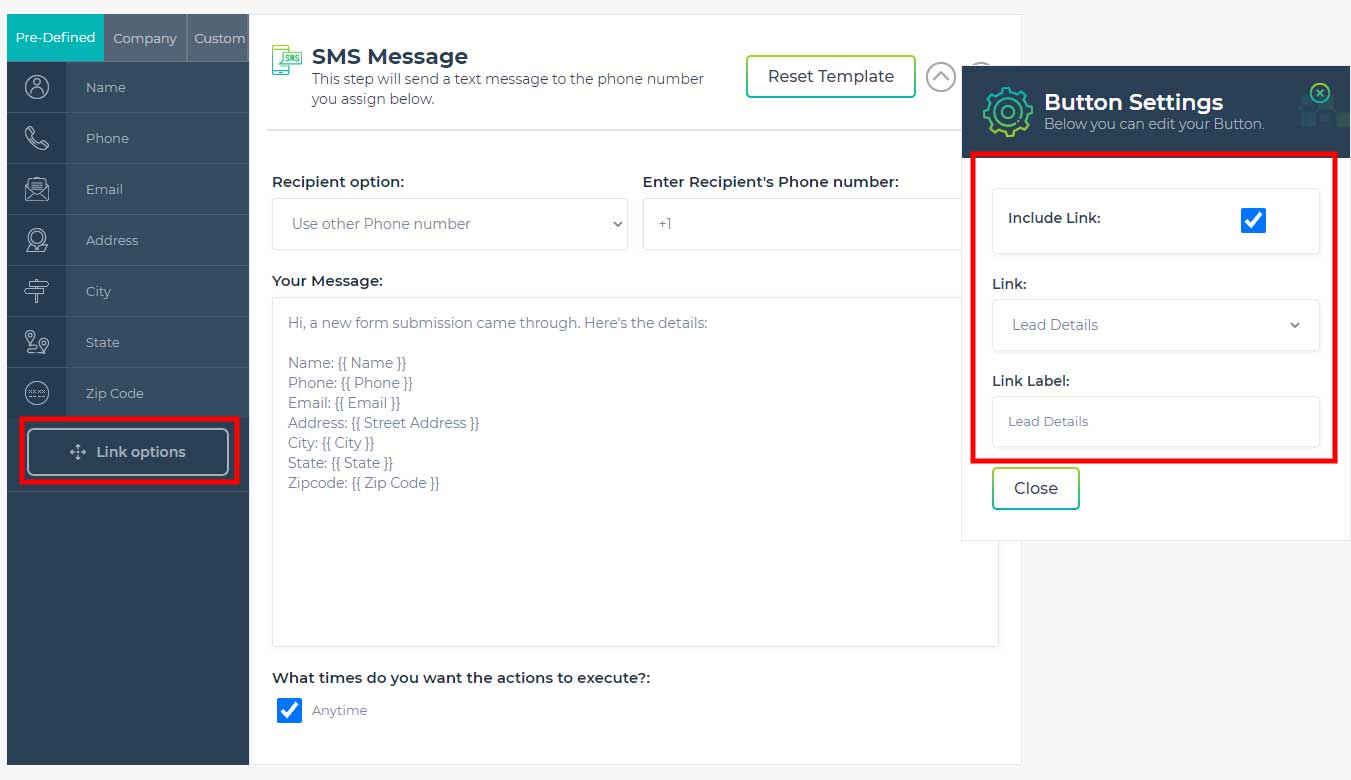
For text messages, the functionality is nearly identical but as you can see in the image below, this one says “link options.”

In either case, you can manage the behavior of the button or link through the menu that slides out from the right side. This window will be visible by clicking either the button options (email) or link option text messages.

Text Link Options

With the text message option, you can include a link by checking the checkbox. Next, you can choose between three options.

Review Funnel – Sends a link to the review funnel that is associated with the lead or contact.
Lead Details – Sends a link to the lead that is associated with the automation.
Other – Sends a link to another URL that you can specify here.
Email Button Options

We have all the same options for links as we do for texting, but we have a little more control since we are able to create buttons in emails that we are not able to create in text messages.

Review Funnel – Sends a link to the review funnel that is associated with the lead or contact.
Lead Details – Sends a link to the lead that is associated with the automation.
Other – Allows you to send a link to another URL that you can specify here.
Button Background Color – Allows you to select the background color of the button to be used with the link.
Button Text Color – Allows you to select the color of the text to be used within the button.
Button Text – Allows you to select the actual words or text to be used within the button.
Create New Automation

To start a new automation, expand the CRM item in the left navigation menu, then select “Automations”
This is the “All Automations” page. Here you will be able to create new automations as well as manage existing ones.

Starting an Automation

Automations can be started in two different ways: with a trigger or by being manually added to an automation.

Lead Detail Page

To start an automation from the “Lead Detail” page, expand the CRM item in the left navigation menu, expand ”Leads,” then select “All Leads”. Select the lead you would like to create an automation for, and click “View.”
You are now in the “Lead Detail” page. To start an automation click the “Add to Automation” button in the top right hand corner to the left of the “Delete Lead” button.


Contact Details Page

To start an automation from the “Contact Details” page, expand the CRM item in the left navigation menu and select contacts. From here, search for the contact you would like to create an automation for and open it up.
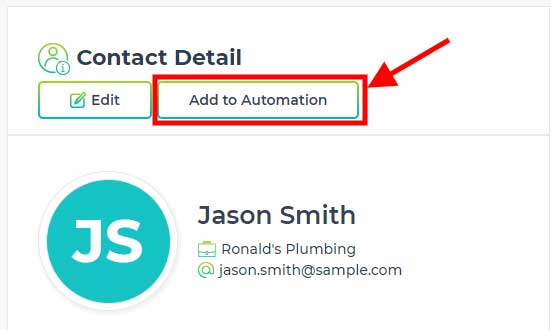
You are now in the “Contact Details” page. To start an automation, select the “Add to Automation” button in the top left hand corner of the page to the right of the “Edit” button.

All Automations Page

To start an automation from the “All Automations Page” expand the CRM item in the left navigation menu then select automations.
You are now in the “All Automations” Page. From here you can create a new automation by clicking the “New Automation” button at the top right hand corner to the right of the “Add to Automation” button.

Naming an Automation

To name your automation, you must first create one. From the “All Automations” page select the “New Automation” button. Then select which type of automation you would like to create from the selections provided.
After selecting what type of automation you will be creating, you will now be able to name it. The custom name field will be located at the top right hand corner of the page and labeled “Sequence Name”.

In Progress Automations

Automation History

You can view the entire history for a specific automation. To do this, start from the “All Automations” page, find the automation you would like to view the history of, then click the “History Logs” button located in the actions tab. This button is the second from the left, right next to the “In Progress” button.

Duplicate Automation

Duplicating an existing automation is very easy. Starting from the “All Automations” page, click the “Duplicate” button which is located in the actions tab. This button is the second from the right, next to the “Delete” button. Once you click duplicate, you will be prompted to name the new automation. After naming your copied automation, click “Duplicate”, then you will be directed to where you can edit your new duplicated automation.

Delete Automation

If you would like to delete an automation, start from the “All Automations” page, and click the “Delete” button that is located in the actions tab. This button is on the far right. After clicking the “Delete” button, you will be prompted to confirm you would like to delete that automation.

Government Compliance

Various governing bodies around the world have restrictions on automation related to phone calls, emails, text messages and unsolicited faxes. By using LeadSnap you assume responsibility for being in compliance with these rules and regulations. Failure to do so can result in legal ramifications that are your responsibility to resolve.

Why Are My Calls Not in All Leads?

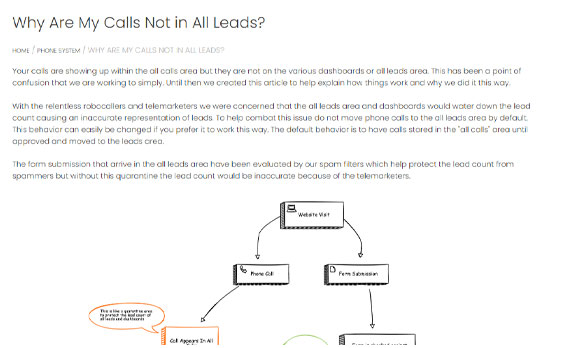
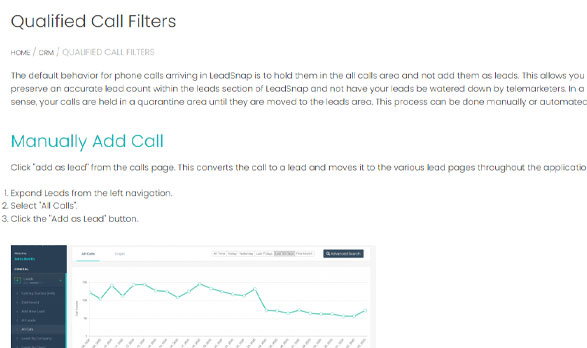
Your calls are showing up within the all calls area but they are not on the various dashboards or all leads area. This has been a point of confusion that we are working to simply. Until then we created this article to help explain how things work and why we did it this way.
With the relentless robocallers and telemarketers we were concerned that the all leads area and dashboards would water down the lead count causing an inaccurate representation of leads. To help combat this issue do not move phone calls to the all leads area by default. This behavior can easily be changed if you prefer it to work this way. The default behavior is to have calls stored in the “all calls” area until approved and moved to the leads area.

The form submission that arrive in the all leads area have been evaluated by our spam filters which help protect the lead count from spammers but without this quarantine the lead count would be inaccurate because of the telemarketers.

The video below will explain this in more detail and show you the two most common ways to move a phone call over to the leads area.