Due Diligence Overview

The Due Diligence Module allows you to easily evaluate and compare niches based on criteria that you decide is important. One of the most important factors in long-term success for any lead generation project is the niche selection. The due diligence tool can save you time and money. Many times a little more research upfront saves us from going down the wrong path.

This tool is designed to help you with this process so you can make a better decision and maximize your chances for success.

Overview Video

Worksheets

To begin the process complete a worksheet on the niche you wish to evaluate. A worksheet is a list of questions that are designed to expose the strength or weaknesses of the competitors in a given niche and market (geographical location).  Your LeadSnap account comes with a default worksheet but if this is not adequate for your needs you can create your own worksheet with our form builder.

Each worksheet has a few required fields, one of them being Rating. The rating is your opinion of how much potential there is for the specific niche based on the answers to your completed worksheet.
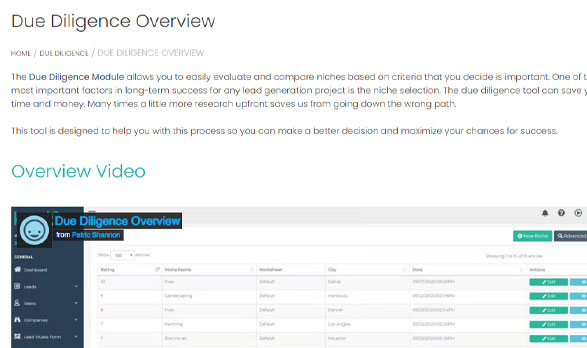
Comparing Niches

After completing a worksheet it is saved on the all niches page. This page allows you to sort, filter, and analyze all of the completed worksheets in one place. You can always view or edit previous worksheets that you have completed in the past.

The advanced search page allows you to filter your completed worksheets by city, niche, rating, and date.

Create New Worksheet

We know the default worksheet is not right for everyone. As Google changes and we learn new things the way we evaluate niches may change. If you would like to create your own worksheet to evaluate your niches you can easily do that with our built-in form builder.

Connect Weebly

Google is incorrectly identifying our Weebly script as malicious software which can cause your ads to be suspended. Please refrain from using our Weebly Scripts with Google Ads until we have a resolution.
Sorry for the inconvenience, we are working hard to get this resolved ASAP.
For now, the workaround is using this Zapier Connection.
Sincerely, LeadSnap Support Team

In this article, you will learn how to connect your Weebly website to LeadSnap. This connection will allow the form submissions from your website to show up within LeadSnap. If you are using the Weebly script this should happen instantly.


Why Connect Weebly to LeadSnap?

There are many reasons to connect your websites to LeadSnap. The first and move obvious reason is so that you can track the performance of your websites and have all your leads in one location. Once the leads are in our system you can start taking advantage of all the powerful sorting, searching, and reporting features. In addition to the organization and reporting features the spam filters built into LeadSnap are very powerful and can save you a ton of time. The spam filters learn as you go and can adjust based on the patterns you see in your spam messages.


Beware of Google Ads

If you are using Google Ads then our Weebly Script can cause some issues. Google Ads incorrectly identifies our script as something potentially harmful to your site because it is sending your form submissions data to a third party, LeadSnap. In many cases, this is not what you want but obviously, in this situation, it is exactly what we want. This is the only product that we are aware of that has an issue with our script. So if you are not running ads through Weebly then this should not cause any problem at all. If you are running ads to a page on your Weebly site we have several workaround options that will allow you to connect to LeadSnap without an issue.

Google Ads Workaround Options

Step By Step Guide

1. Login to LeadSnap. Click on “Settings”, then “Integrations”.

2. In the Weebly box, click on the “Connect Weebly Site” button.

3. Select the company that you would like to connect from the company select box and click submit to create the Weebly script.

4. Copy the script generated for you by clicking the copy button.

5. Login to your Weebly account.

6. On the top right menu, select the website you’d like to connect to LeadSnap, then click on “Edit Site”.

7. On the top menu, click on “Settings”.

8. On the left menu, click on “SEO”.

9. Paste the script copied from LeadSnap into the “Footer” area of your website.  We recommend making the LeadSnap Weebly script the first piece of code within the footer code area. So if you have an existing one add our code above the existing one. Next, click the save button in the lower right corner and then the publish button in the top right corner.

10. As a final step, it is a good idea to click on the build menu option and then click back to Settings and SEO to ensure the Weebly code was saved properly. If you do not see the Weebly script in the footer code area then it was not saved properly and it will not work until it is saved correctly in this area. If you see the script is not showing in the footer area of the SEO settings after returning from the build area paste the code in again and make sure to click both Save and Publish as shown in steps 8 and 9.

Next Steps

Now that you have successfully connected your WordPress Site. Here are a couple of next steps you should do to make sure things are set up correctly.

Connect WordPress

LeadSnap allows for seamless integration to your WordPress websites. Form submissions are instantly available within LeadSnap as they are submitted from your website. Once they are in our system you can take advantage of our powerful reports, search, and sorting filters. In addition, our spam filters are very powerful and will make form submission spam messages a non-issue for you and your agency.

Current Supported Form/Page Builders

  • Beaver Builder
  • Brizy Builder
  • Caldera Form
  • Contact Form 7
  • Divi Page Builder
  • Elementor Page Builder
  • Gravity Forms
  • Gutenberg
  • Ninja Forms
  • SmartForm
  • Thrive Theme Builder
  • TypeForm
  • WP Fluent Forms
  • WP Forms

WordPress Connection Alternatives

Don’t see your form or page builder listed? No problem, we have workarounds. We are continually adding more integrations for WordPress so if you would like yours to be added submit it as a feature request through our ticketing system here: Submit a feature request

If you do not have one of these you can still get all of your form submissions into our system without an issue. Below are two workarounds that will work with LeadSnap 100% of the time.

Step by Step Guide

LeadSnap Settings

1. Log in to your LeadSnap account. Click on “Settings” on the left menu, then “Integrations”.

2. Click on “Connect to WordPress Site”.

3. Select the company from the select box that you would like to connect with LeadSnap and click the submit button.

4. Click the copy key button from the popup menu.

WordPress Settings

5. Log in to the admin area of your WordPress website. Click on “Add New” under “Plugins” on the dashboard menu.

6. Search for and install the LeadSnap Plugin

7. Click on “Activate Plugin”.

8. Choose settings from the WordPress Dashboard menu and Select the LeadSnap Option.

9. Paste the API key you copied from LeadSnap into the “API Key” field in the LeadSnap Settings page within the WordPress dashboard. Make sure the “Enable sending to CRM” checkbox is checked and click the Save button. After clicking the save button you should see the company you created within LeadSnap listed in the Send to Company field.

Test the Connection

10. Send a test form submission to LeadSnap from your website.

11.  Within LeadSnap expand “Leads” from the left navigation and click on “All Leads”. You should see your test form submission on all leads screen. If you do not see your form submission check the connection settings as well as the spam filters within LeadSnap.

Next Steps

Now that you have successfully connected your WordPress Site. Here are a couple of next steps you should do to make sure things are set up correctly.

Assign companies to a user

LeadSnap gives you the flexibility of being able to assign one company to multiple clients or multiple companies to a single client, aside from a one to one relationship.

You may have one lead generation website that produces so many leads you divide them between several clients or you may have a few websites producing lots of leads to a single client.

Either way, in this section you will learn how to assign a company or more to a single user.

Steps

  1. On the left menu, click on “Users”, then “All Users”.
  2. Find the user you wish to assign a company to. Click on “View”.
  3. Click on “Profile”.
  4. Click on “Edit User”.
  5. Click on “Companies List” by “Assign Companies” and select the company or companies you want to link this user to.
  6. Click on the Update button.

Video Tutorial

Need more details or just want to see how it’s done? Watch the video below.

Differences between user roles

LeadSnap has three different user roles that can be assigned.

Admin

The admin user role has is the account owner and has full capabilities within the account. Admins have the ability to change the details of the account, create new users of any role as well as deleting users.

Manager

Managers are part of your agency with access that can be limited on a company basis. Your managers will have the ability to perform any of the following tasks within the companies that have been assigned to them.

  • Add clients
  • Can edit other managers and client accounts
  • Edit assigned companies
  • Assign a company to a manager or client
  • Add new leads (within assigned companies)
  • View leads (within assigned companies)
  • Edit existing leads (within assigned companies)
  • Delete leads (within assigned companies)
  • Assign leads (to assigned companies)

Client

The client role provides access to the clients of the account owner or admin. The client role is the role with the least amount of privileges.  This role has the ability to login and see the leads that have been assigned to their user role.

  • Add new lead
  • View assigned leads
  • Edit existing leads assigned to their account.
  • Delete leads assigned to their account.

Edit an existing user

There are three user roles that can be assigned to a new user: admin, manager, and client. Click here to learn more about the different user roles.

The edit user screen allows you to control all the settings for users on a user level. This includes their profile information such as name, email, phone, company as well as their user role, lead delivery settings and notifications.

Navigate to Edit User

  1. On the left menu, click on “Settings”, then “Users” and finally “All Users”.
  2. Find the user you wish to edit and click on “View”.
  3. Click on “Edit User” in the top right corner.
  4. Make your changes.
  5. Click on the “Update” button to save your changes.

Profile Tab

The profile tab allows you to adjust the basic user information such as name, address, phone, email address, website and password. This is also the location where you change the companies that the specified user is associated with. If you need to change the user role for a user, you can do so from the profile tab on the edit user screen.

Lead Delivery Settings Tab

This tab is only available for the client user role. Any companies that are assigned to the user will be listed on this screen.

Auto-Forwarding – From this screen you can adjust the auto-forwarding settings for a user on a company level. You an make this same adjust on a user level from the edit company screen.

Email Leads – The email leads box allows you to designate the receiving email address for leads associated with this client. By default we will select the email address provided for the client when the client is created however you can adjust that here. It is required to have at least one email address for this field. As many clients like to have their leads sent to multiple email addresses you do have the option to add several email addresses to this field.

Notification Settings Tab

The notifications tab allows you to set notifications for companies and GMB on a user level. Users have the ability to manage their notifications and admins also have the option to manage the notifications for users. In-App notifications will trigger the notification bell in the top right corner and the email notification will send an email to the email address associated with the user’s profile tab.

Notification Bell

Archive a user

You can archive and permanently delete users. Leads associated with an archived user will also be archived. Archived users can be restored and leads that were previously assigned to them will also be restored at that point.

Leads assigned to permanently deleted users will remain in the system as their main association is with the company they are linked to.

Steps

  1. On the left menu, click on “Settings”, then “Users” and finally “All Users”.

2. Find the user you wish to archive. Then click on “View”.

3. On the top right of the screen, click on “Archive”.

4. A popup window will show up to confirm you really want to archive this user. Note that if you archive a user leads associated with him or her will also be archived.
Click on the “Confirm” button to go ahead and archive this user.